1. Login Interface
When you open the software, you first arrive at the login interface, as shown below:
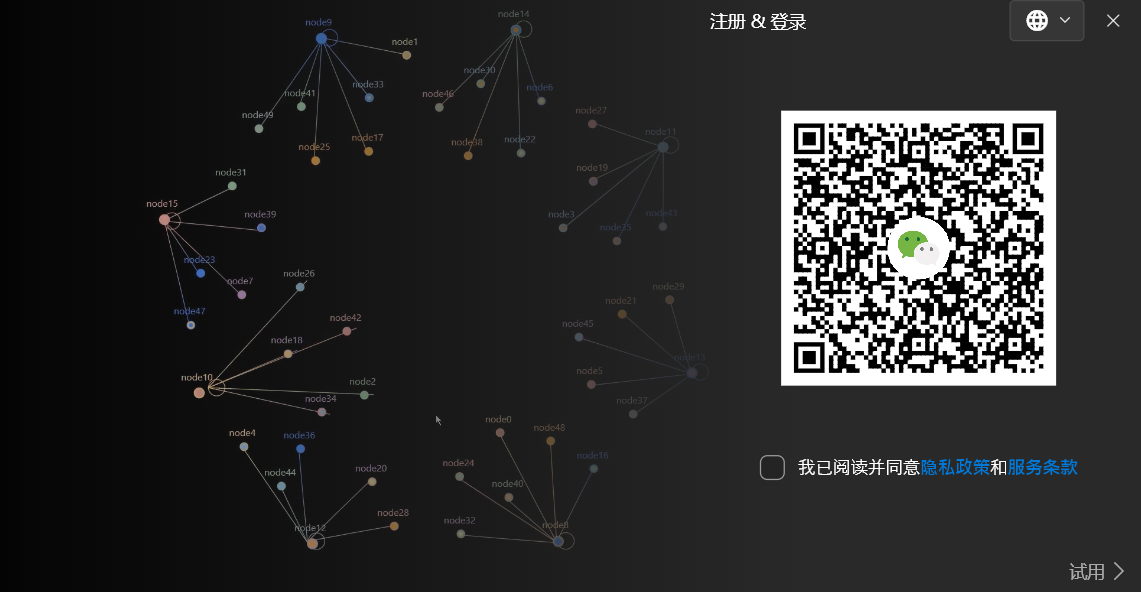
Use your mobile WeChat to scan the QR code, as shown in the image:

After reading and agreeing to the [Privacy Policy] and [Terms of Service], click [OK] to complete the login.
2. [Folder] Interface (Main Interface)
After a successful login, you enter the StarShadow Graph Database client interface, as shown:
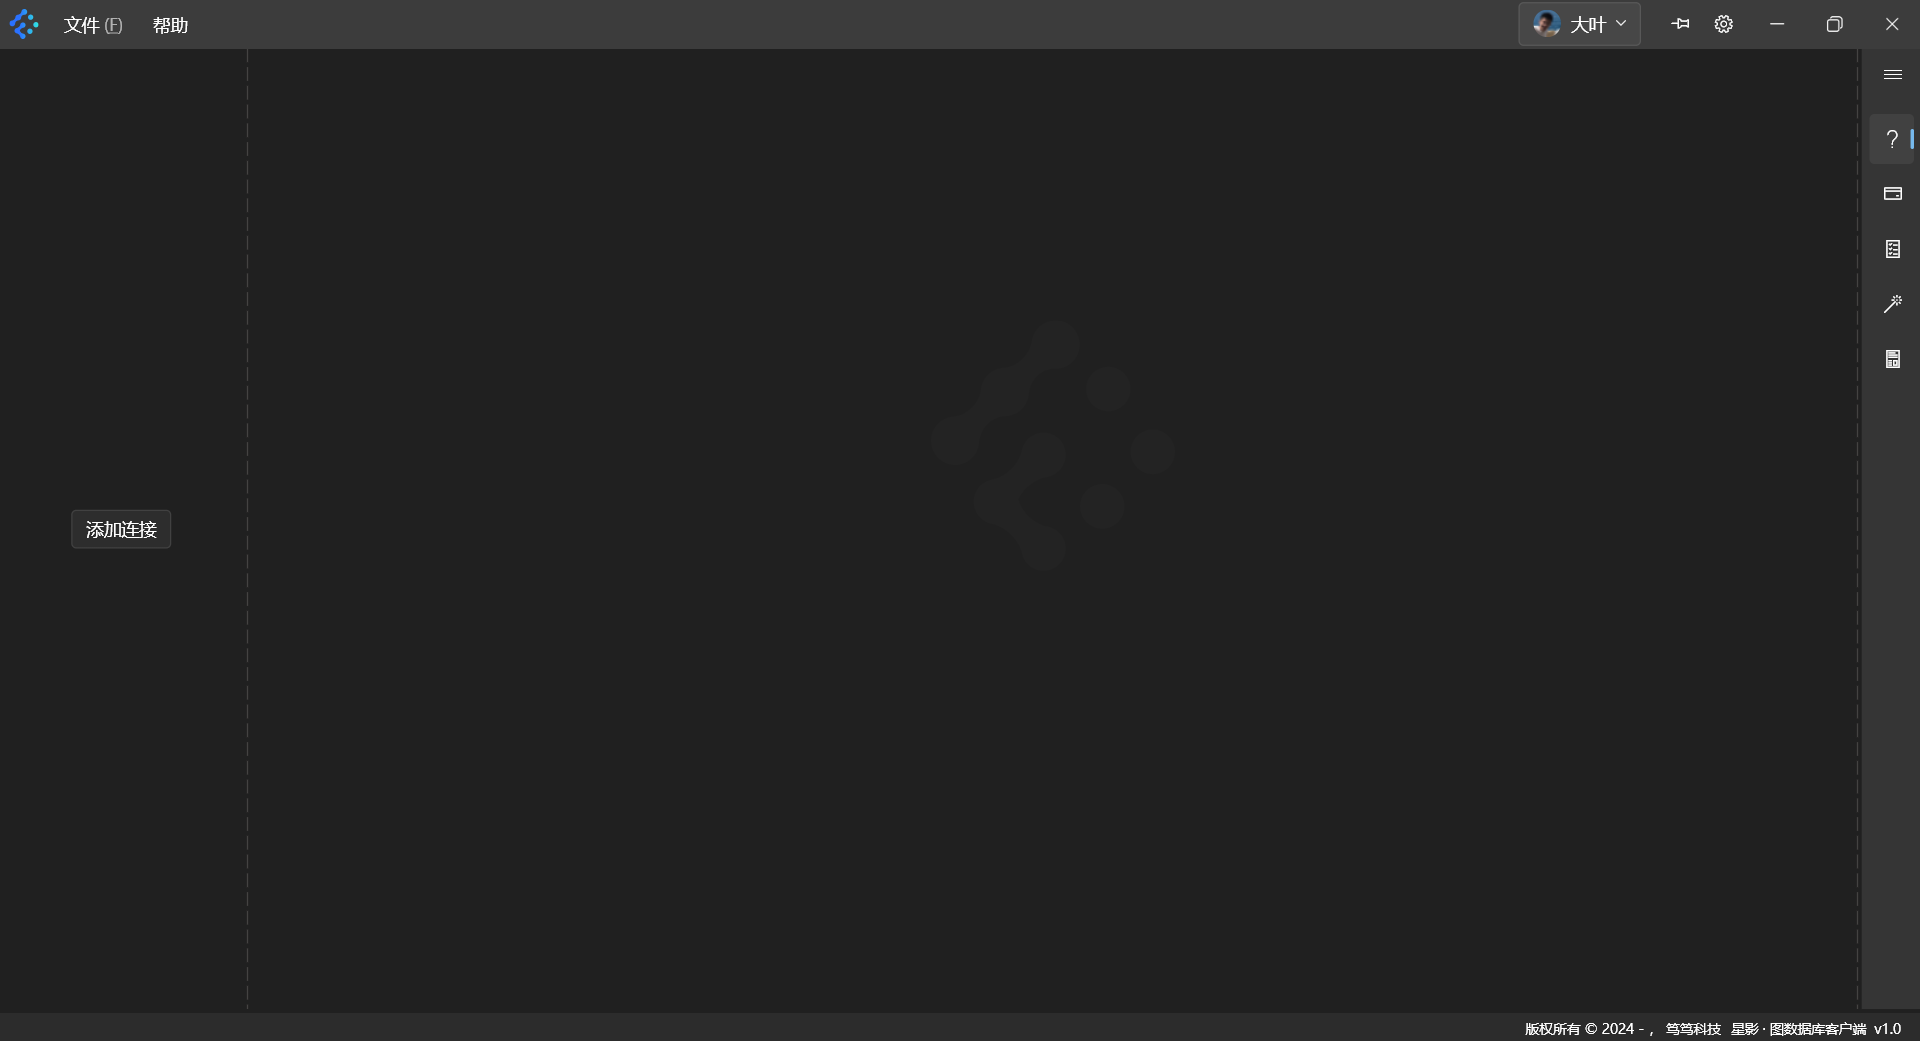
By default, the generated local storage files are placed under the user’s personal folder on the computer. That folder is then used as the project workspace, storing any database query scripts generated by the user. The exact path varies by operating system.
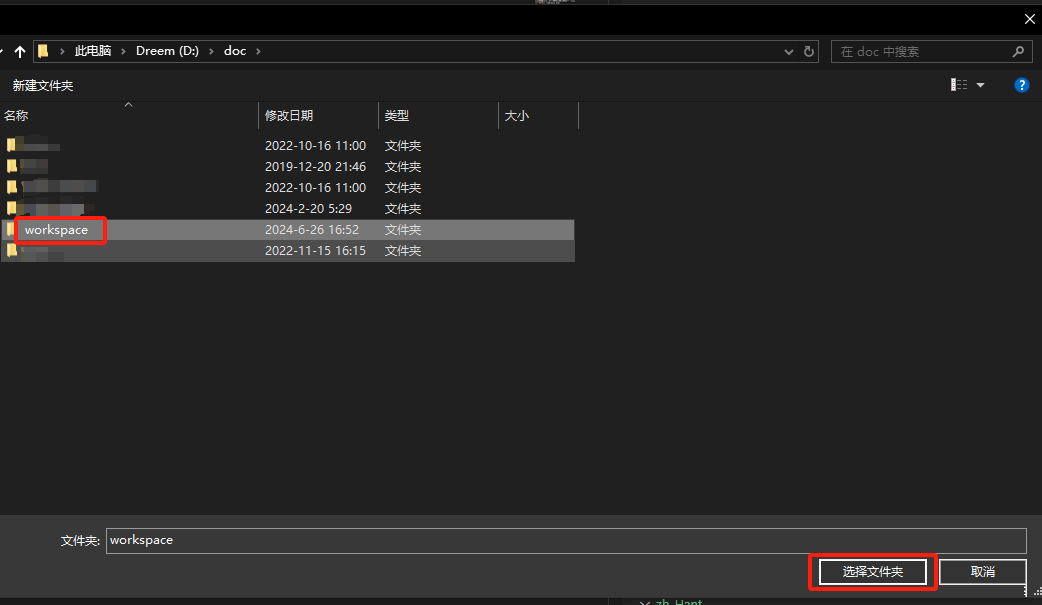
2.1. Open a Folder
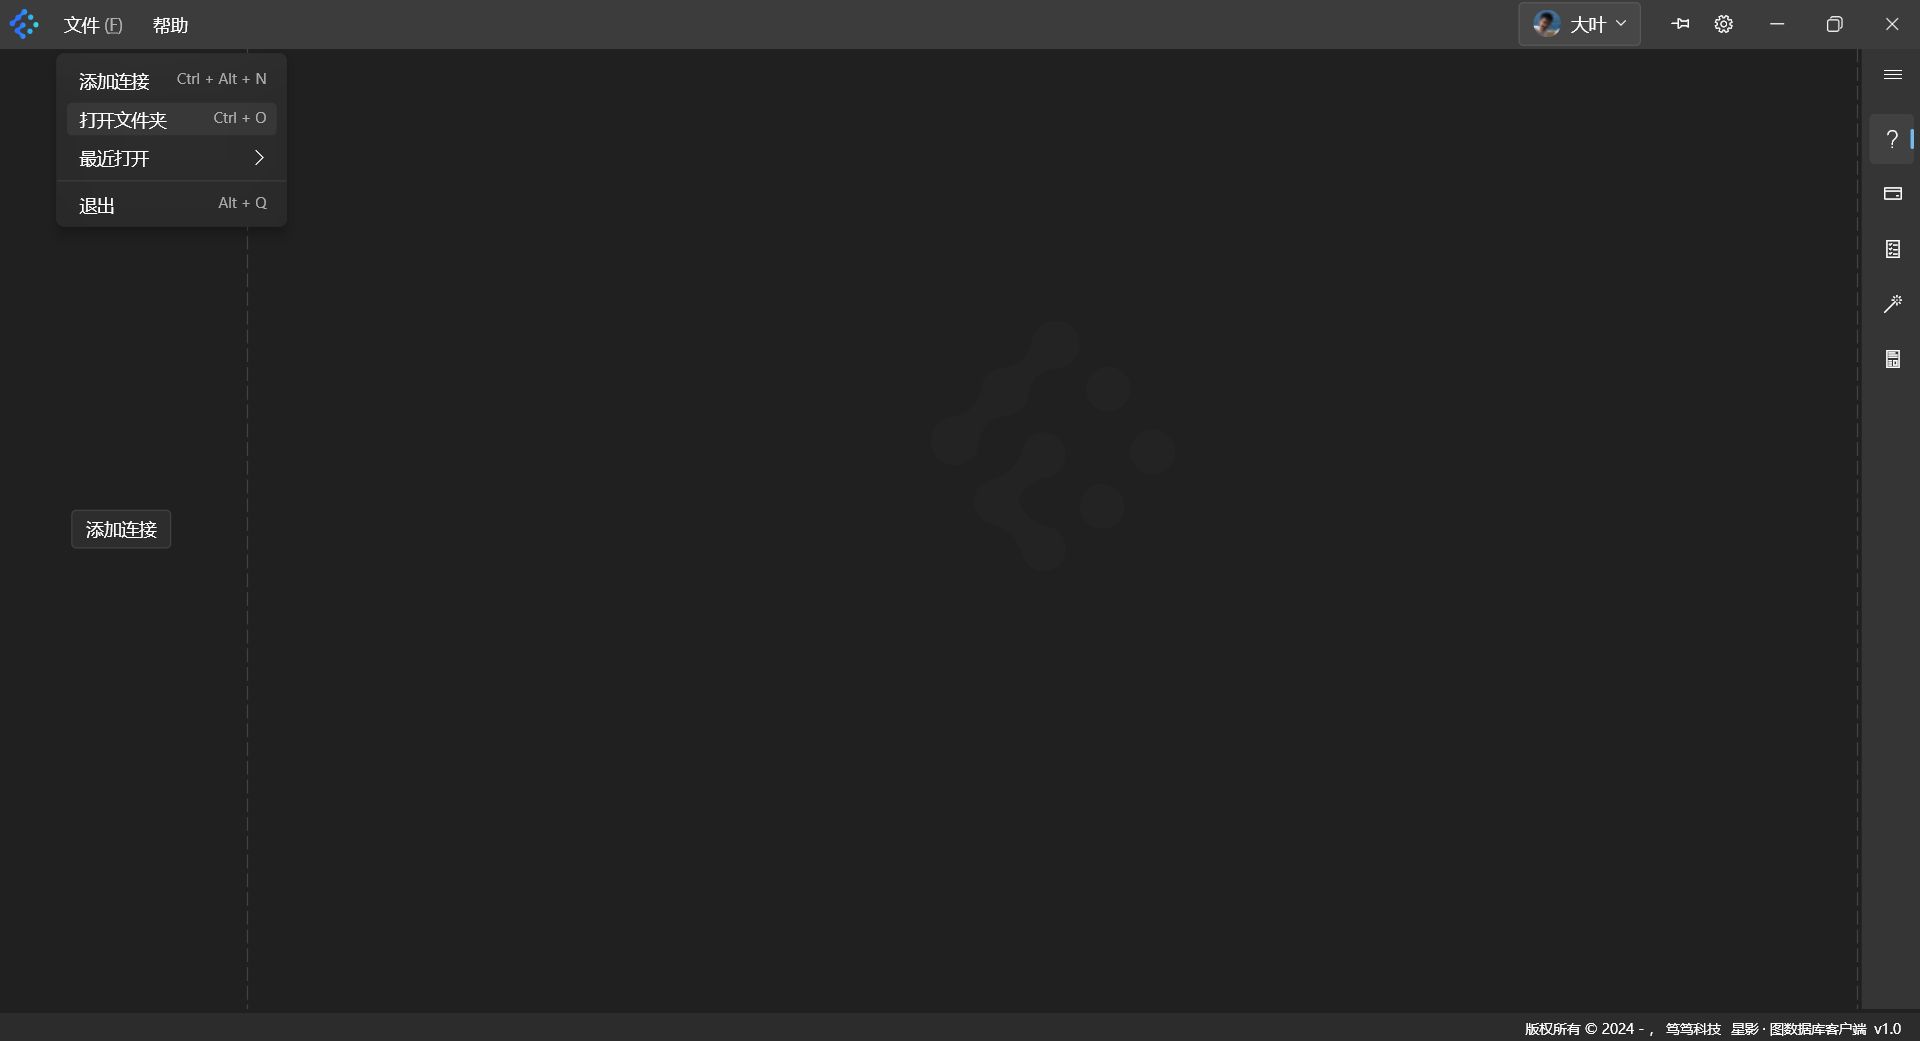
Click [File] -> [Open Folder]. In the system file browser dialog, select a new workspace folder to open as a project workspace.
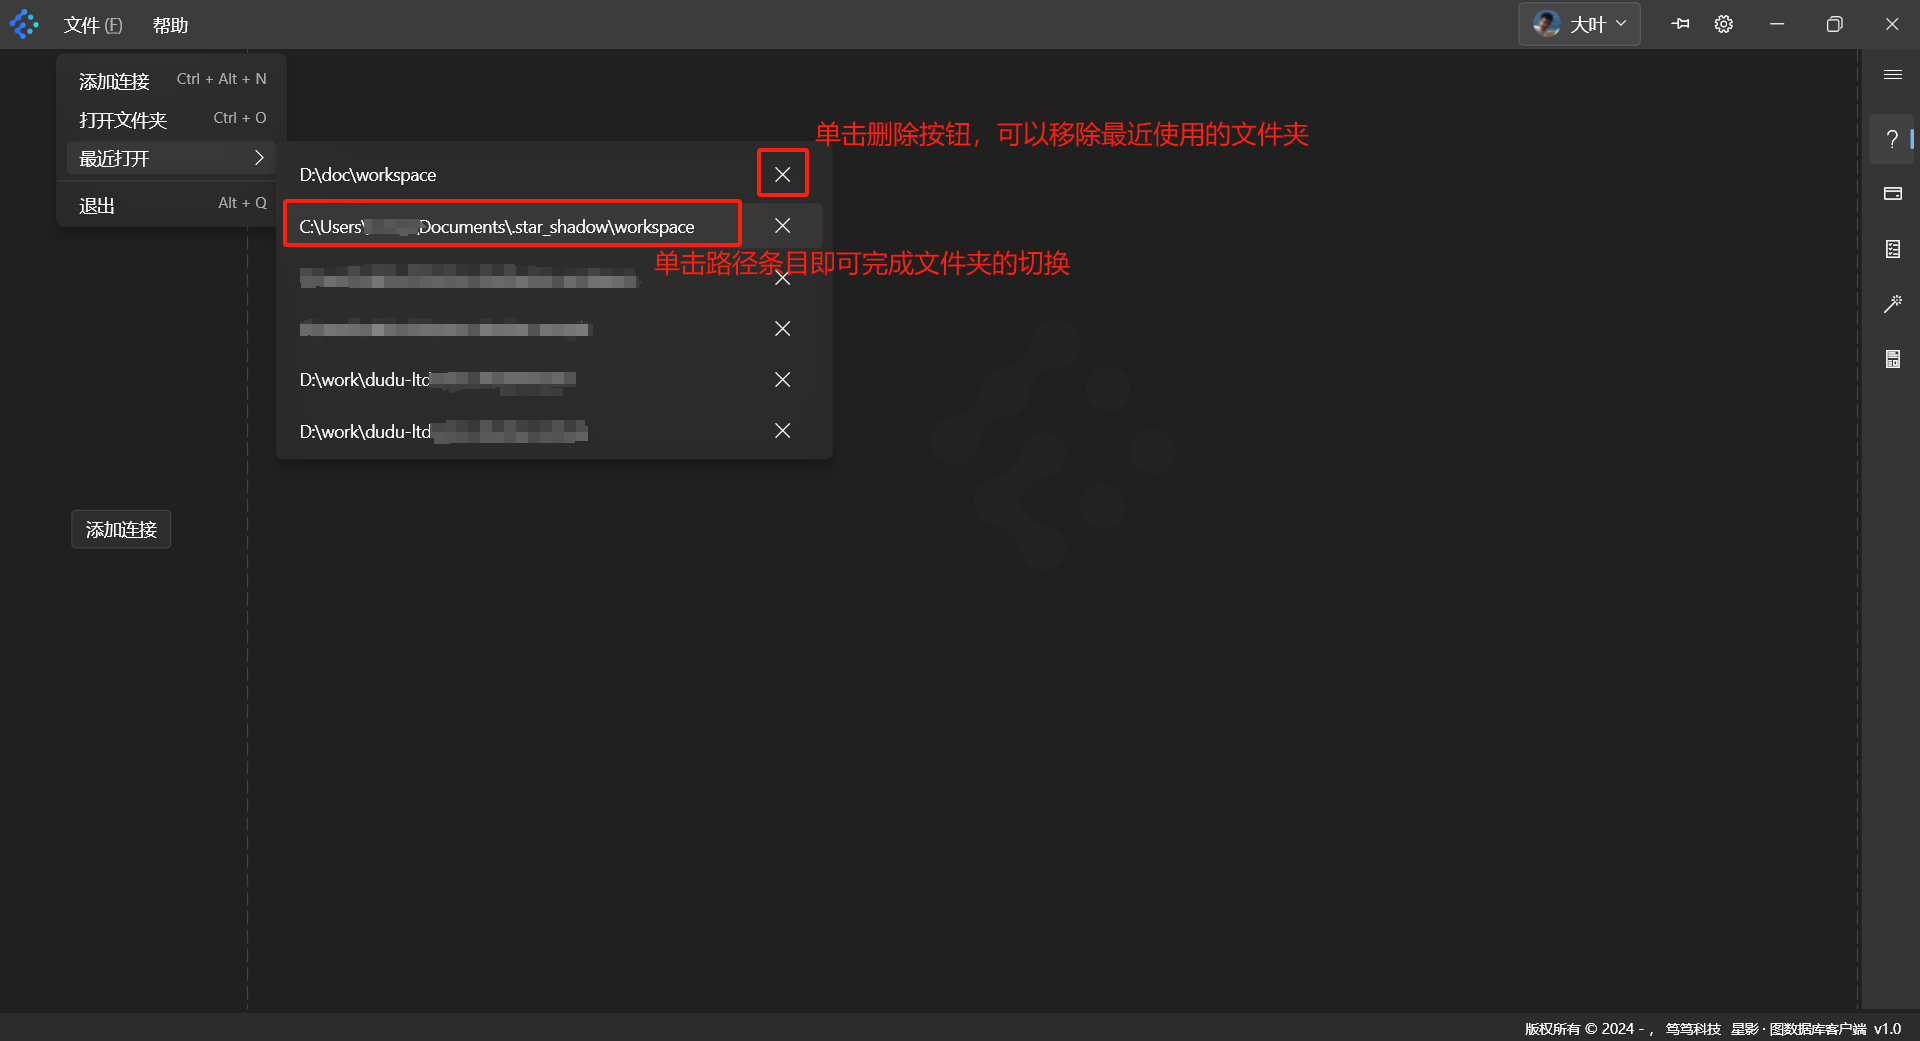
2.2. Switch or Remove a Folder
- Switch Folder: Click [File] -> [Open Recent]. Select a folder from the list of recently opened folders to switch to it.
- Remove Folder: Click [File] -> [Open Recent]. Click [X] next to the folder entry you wish to remove from the list. This only removes the shortcut link from the [Open Recent] list; it does not delete the actual folder.
3. Data Source Connection Interface
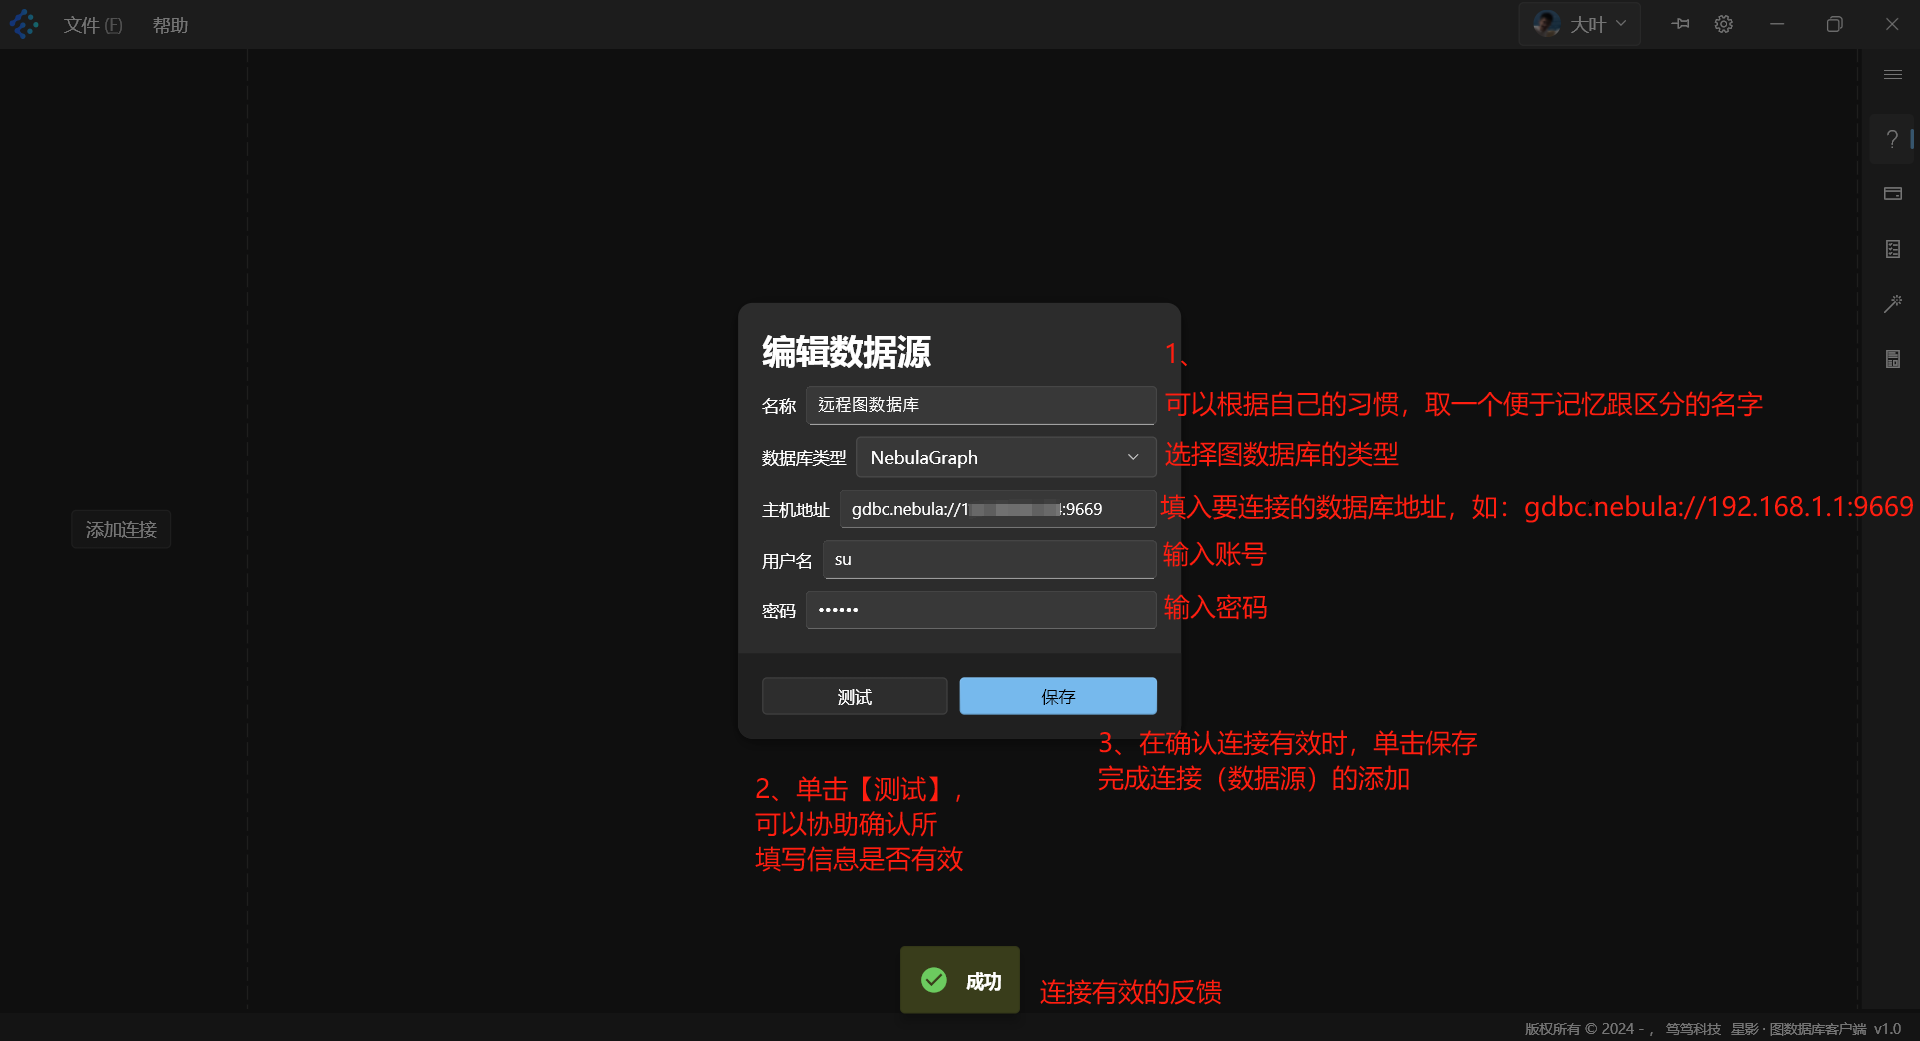
3.1. Add a Connection
If the default folder or a newly opened folder does not already have a database connection defined, you can click [Add Connection] on the left side of the interface or go to [File] -> [Add Connection]. A form will appear for entering the required connection details:
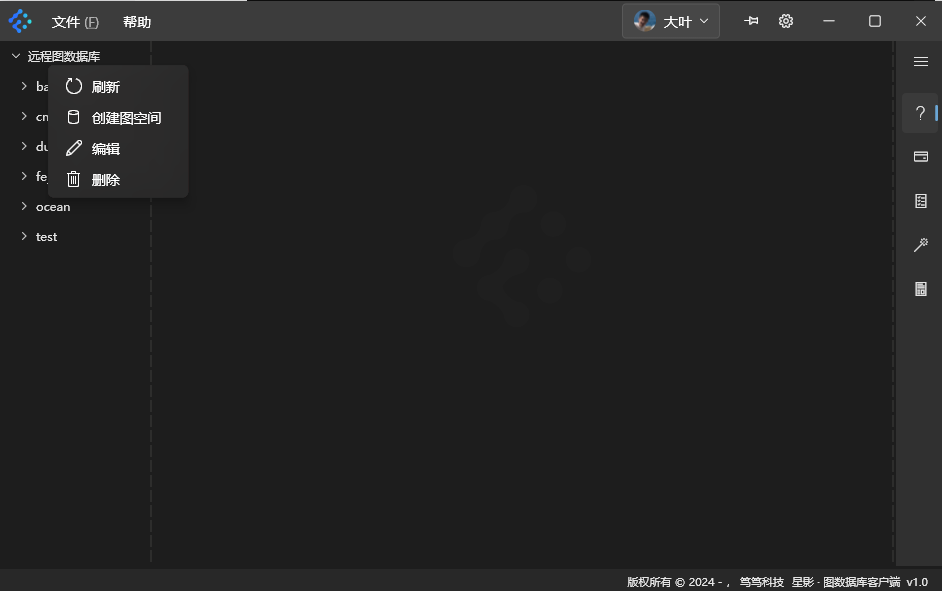
- After a successful addition, the database appears in the list on the left.
- Click the arrow on the left of the database name to expand the graph database’s spaces.
- Right-click the database name for further operations.
Illustration:
3.2. Edit
In the right-click menu on the database name, select [Edit] to edit the database connection details. It functions the same as [Add Connection].
3.3. Delete
In the same right-click menu, select [Delete] to remove this database connection from the workspace. This does not affect data on the remote database.
4. Schema Operations in the Database
4.1. Refresh
Right-click the database name and choose [Refresh] to synchronize the database’s schema information, including Spaces, Tags, and Edge Types. Expanding or collapsing the arrow on the left of the database name has the same effect.
4.2. Create a Space
Right-click the database name, and select [Create Space], which opens a form to create a new space, as shown below:

4.3. Refresh the Schema under a Space
Right-click the space name. A context menu appears, as shown:
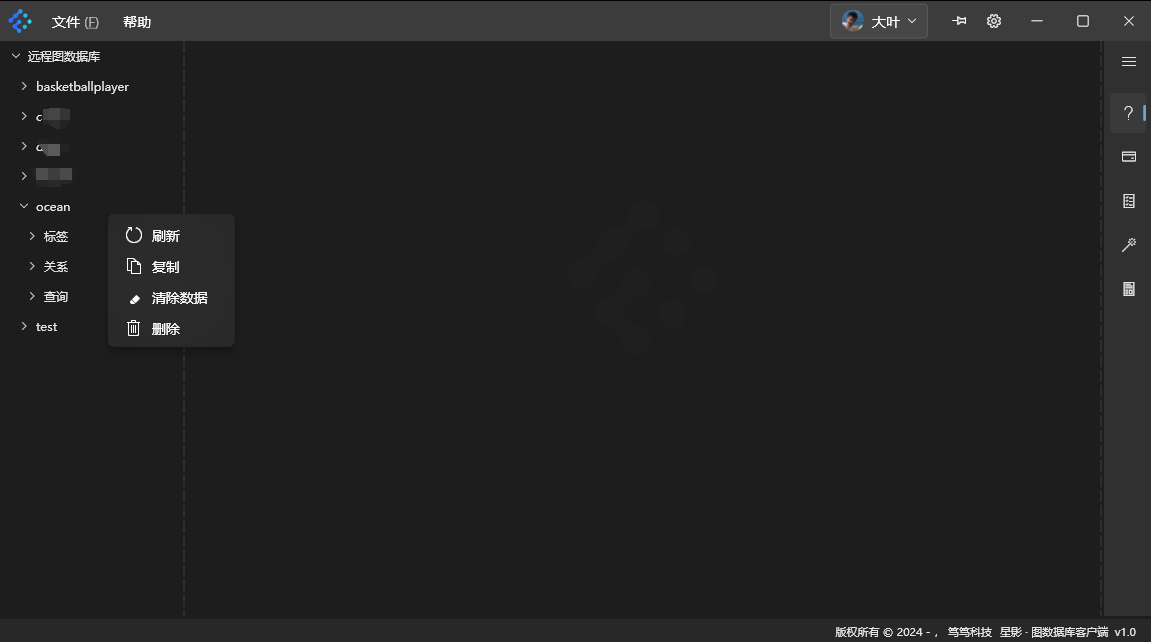
The refresh function here is the same as in [4.1. Refresh].
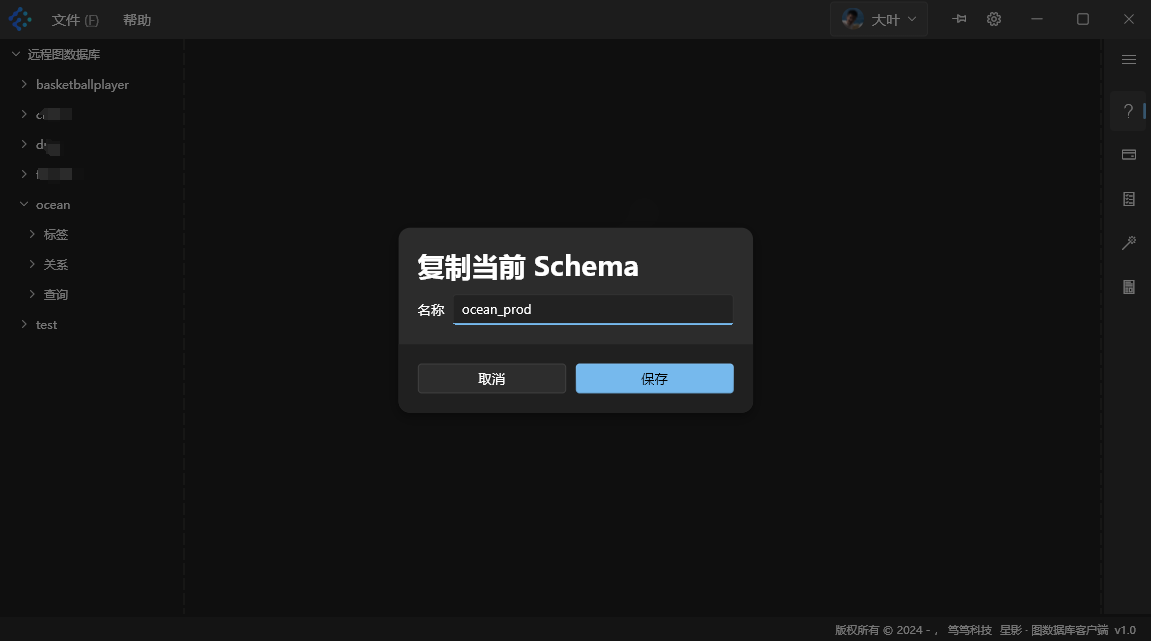
4.4. Copy a Space’s Schema
Right-click the space name and select [Copy]. In the dialog that appears, enter the name of the new space. This replicates the schema of the current space into the database, including its configuration, tag tables, and edge tables.
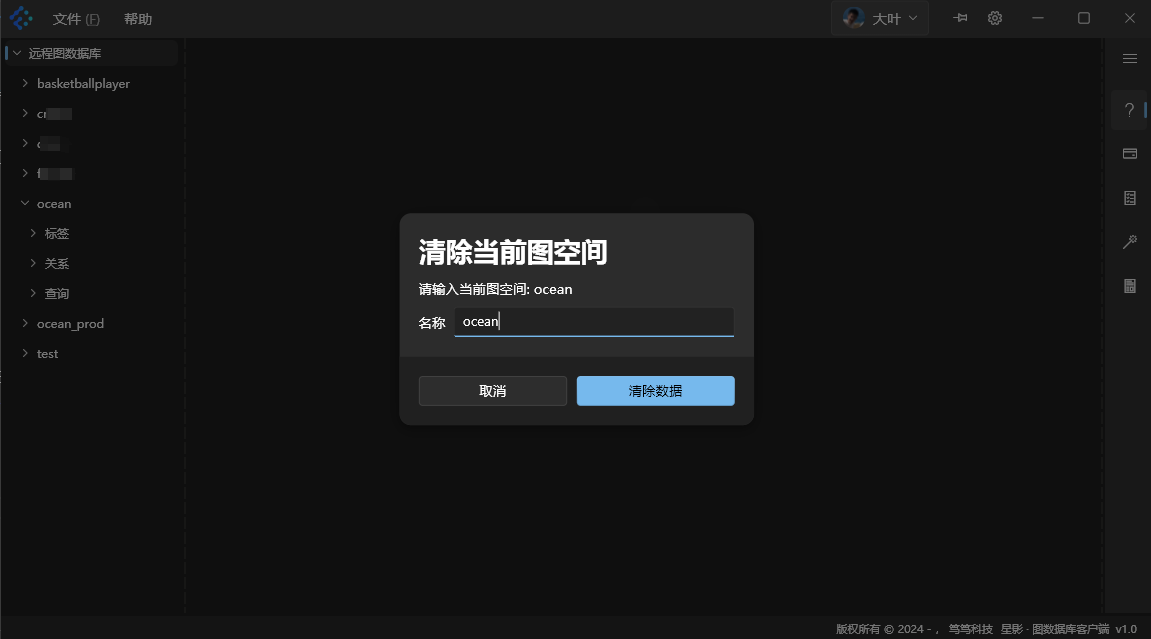
4.5. Clear Data in a Space
Right-click the space name and select [Clear Data]. In the confirmation dialog, enter the current space’s name. Click [Save] to clear all data in that space, while retaining its table structures.
4.6. Delete a Space
Right-click the space name and select [Delete]. In the confirmation dialog, enter the current space’s name. Click [Save] to delete the space entirely, including any data and table structures within it.

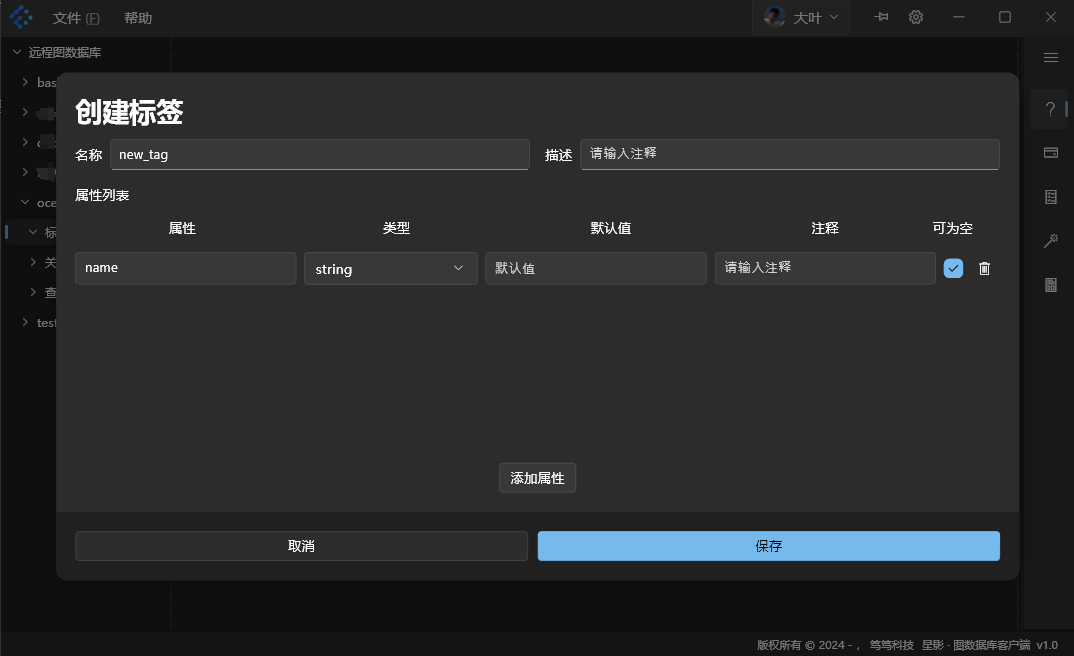
4.7. Create a Tag or an Edge
In the right-click menu under [Tag] or [Edge], select [Create]. Enter the name of the tag or edge, then click [Add Property] as needed to add fields. After clicking [Save], the new tag or edge is created.

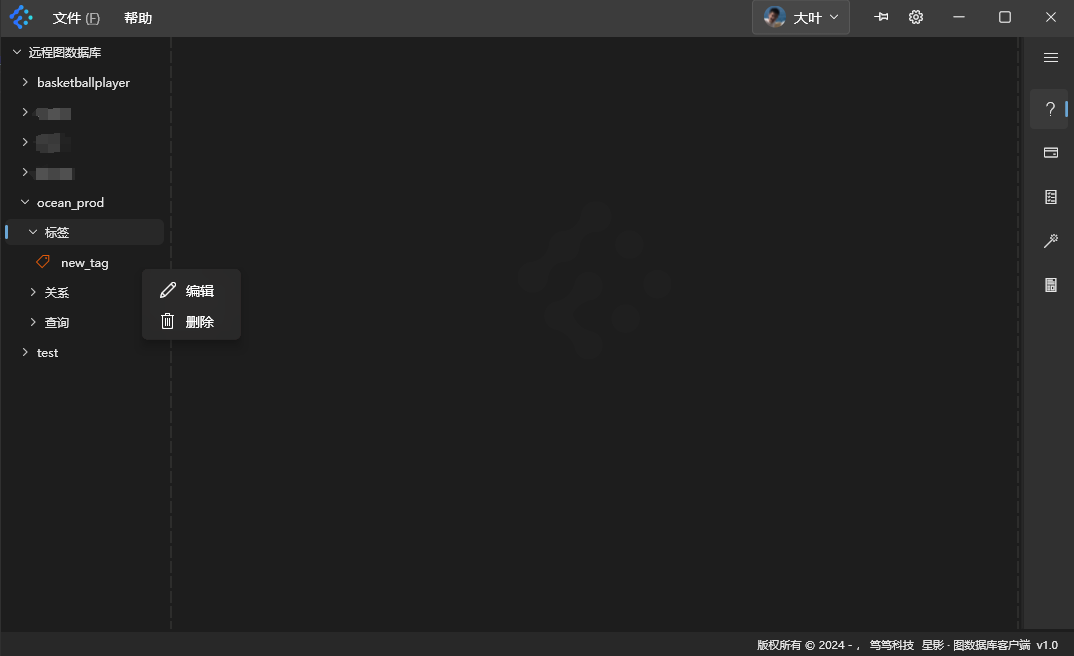
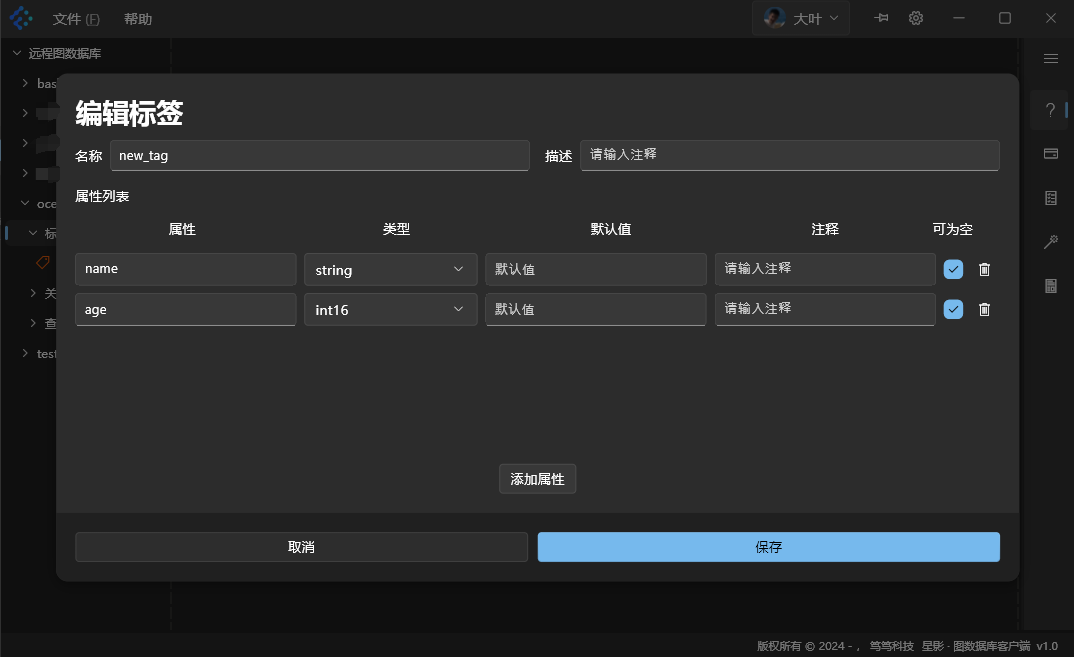
4.8. Edit a Tag or an Edge
Under [Tag] or [Edge], right-click the child element (for example, [new_tag]). Select [Edit]. In the popup form, you may add new fields, change their types, specify default values, or delete them.
4.9. Delete a Tag or an Edge
Under [Tag] or [Edge], right-click the child element you wish to delete. In the popup form, enter the name of the tag or edge to confirm. Click [Save] to delete the tag or edge.
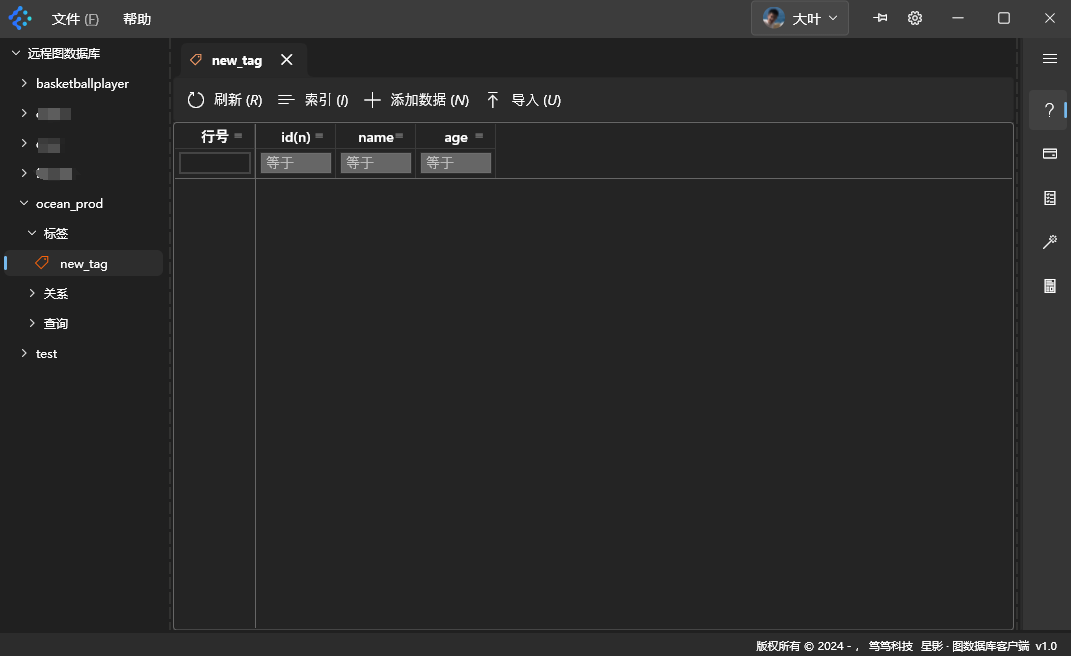
4.10. Preview the Data of a Tag or an Edge
Click on a child element under [Tag] or [Edge]. A table preview of data for that element displays in the main operation area, as shown:
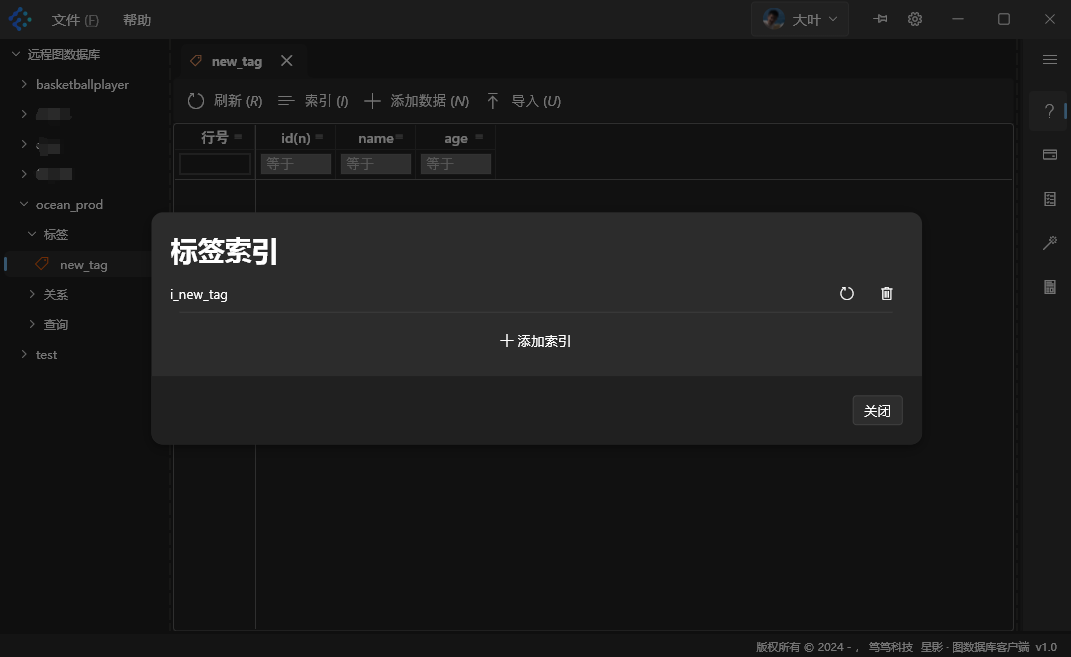
4.11. Create an Index
In the data preview interface, click [Index] at the top of the main operation area. A popup window will appear. In this window, you can click [Add Index] and then drag-and-drop the fields you want to index to the designated area, as shown:

Click the save icon to finish creating the index.
TIP
Generally, you should create indexes after importing data. The example above is just a demonstration of how to create an index.
4.12. Rebuild or Delete Index
In the same popup, you can select the rebuild or delete icon to rebuild or delete the index. Click [Close] to close the index operation interface.
5. Data Operations
5.1. Add Data
In the data preview interface (see section [4.10]), click [Add Data]. A popup form appears where you can enter the field values. Click [Save] to finish adding the data. 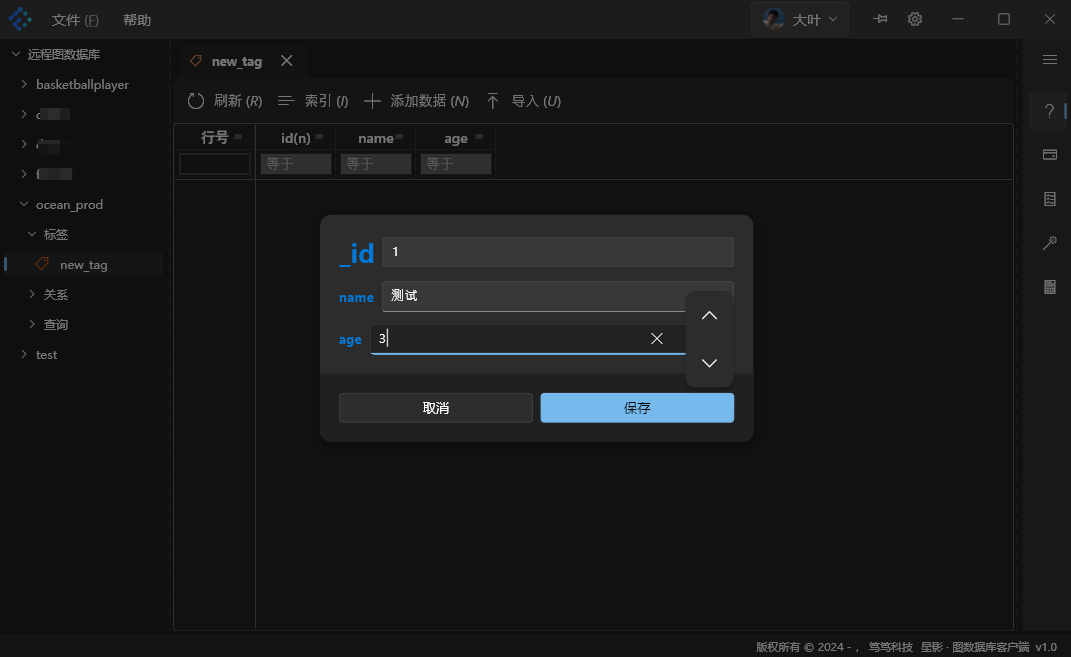
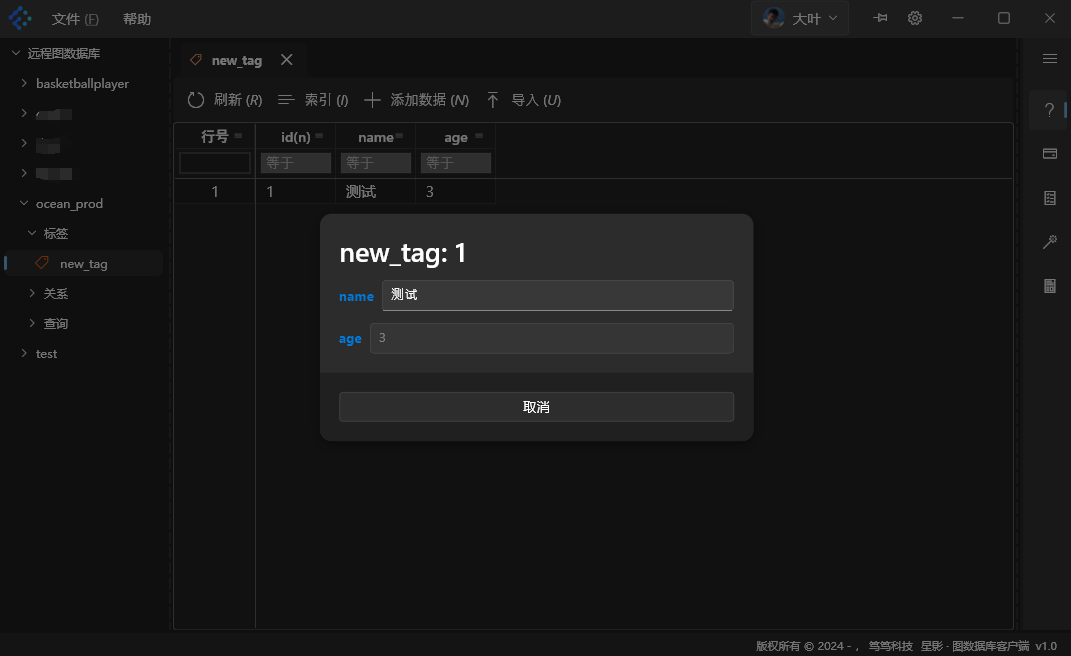
5.2. View Data
After adding the data, the table automatically refreshes to show the newest entries. To view full details of any row, right-click the row number in the table’s [Row #] column and select [View]. This function is primarily for examining data in larger fields.

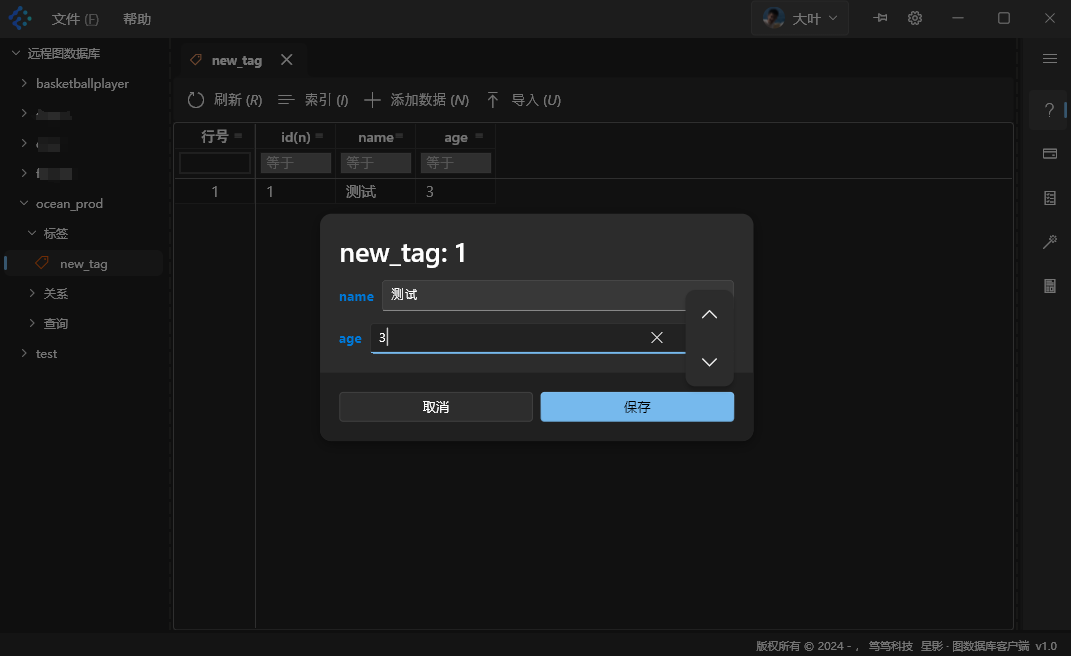
5.3. Edit Data
To edit a row, right-click its row number in the [Row #] column and select [Edit]. In the popup form, modify the field values. Click [Save] to finish editing.
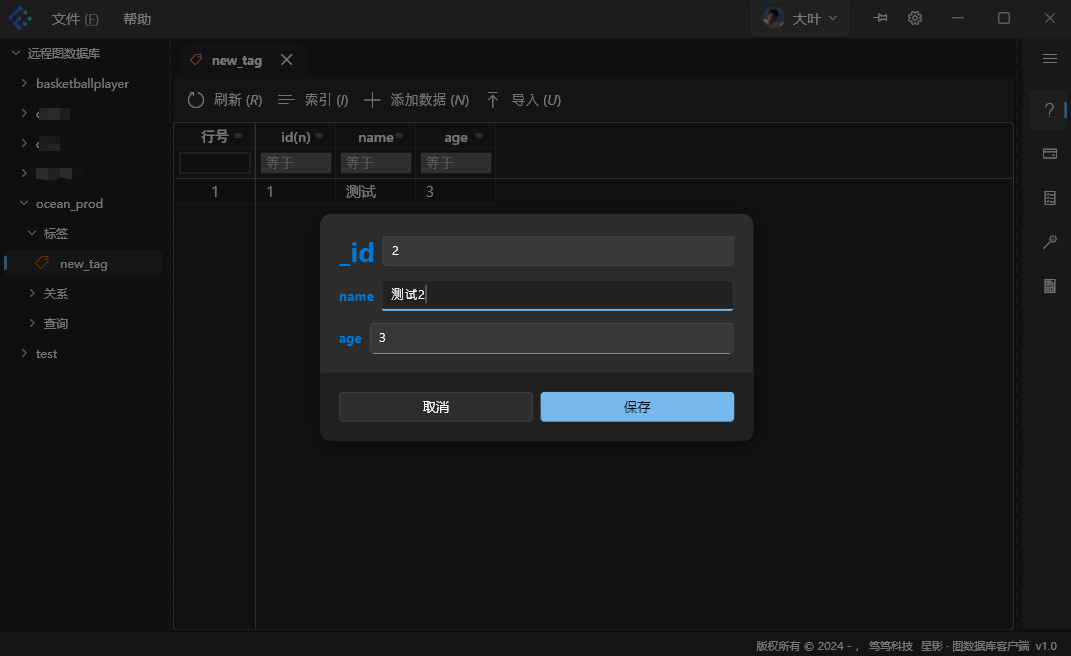
5.4. Copy Data
To copy a row, right-click its row number and select [Copy]. In the form that opens, enter a new id for the data and modify any fields if necessary. Click [Save] to finish copying.
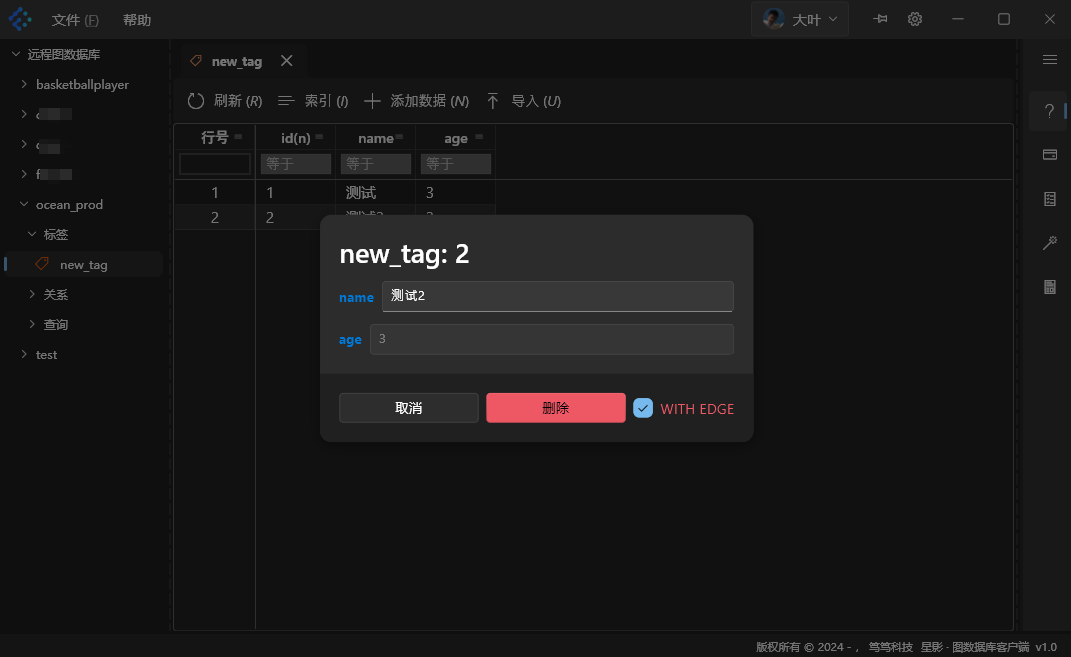
5.5. Delete Data
Right-click the row number in the [Row #] column and select [Delete]. A data preview interface appears. Click [Delete] to confirm. If the object you are deleting is a node, you can choose [WITH EDGE] to decide whether to also delete its related edges.
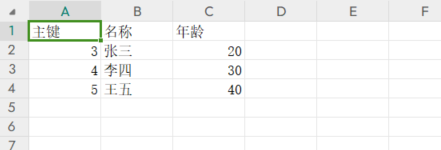
5.6. Import Data
First, prepare a CSV file named data_imp.csv that contains your data, shown here:
At the top of the data preview table, click [Import]. A file selection dialog appears, as shown below:
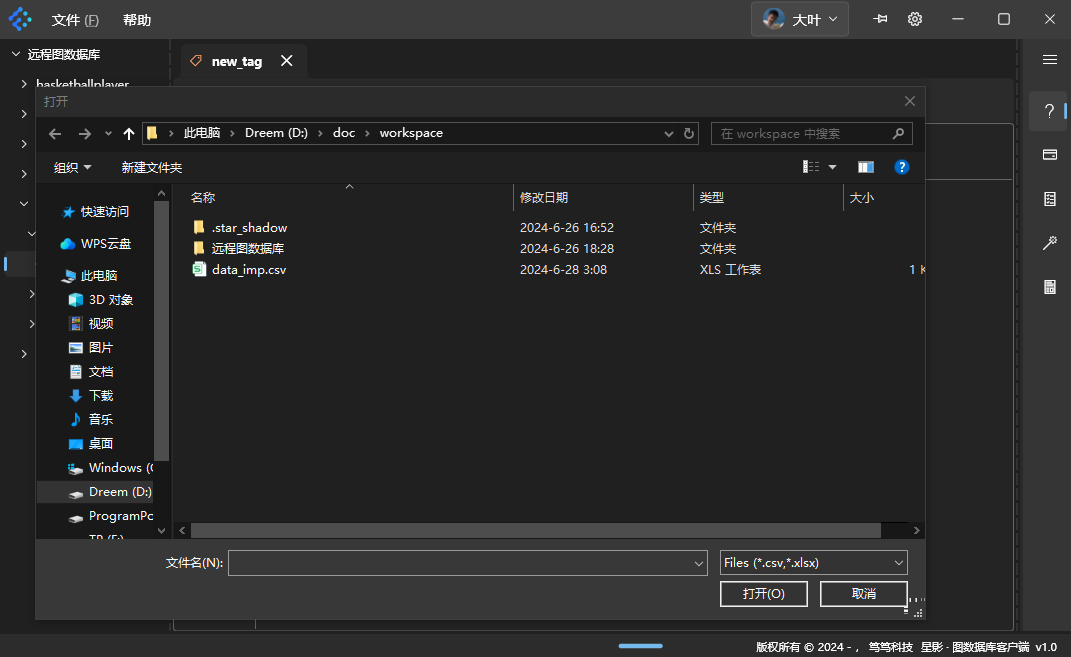
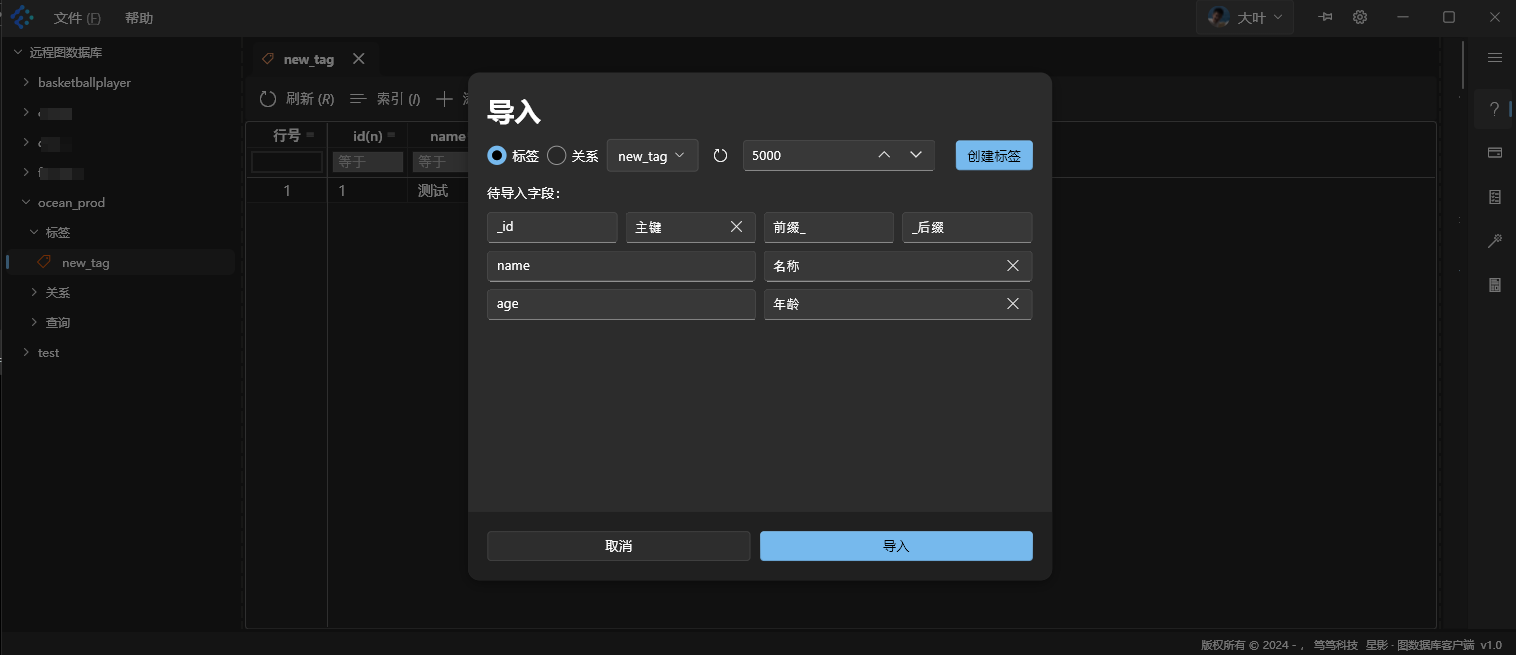
Double-click data_imp.csv or click and select the file, then click [Open]. After reading the file, a data import interface will appear:

Drag each field from the file to its corresponding column on the right. If necessary, append prefixes or suffixes to the primary key to avoid conflicts with other data. Large data files are imported in batches (default size is 5000 records per batch). Adjust the batch size if your CSV has many columns. Click [Import] to start the import.
After the import is finished, click [Refresh] to see the newly imported data.

5.7. Create Table Structures from Data Files
If the file’s columns do not match the current table structures, you can click [Create Tag] (or [Create Edge] if you have [Edge] selected). By default, the CSV header row becomes the field names. You can edit them if needed:
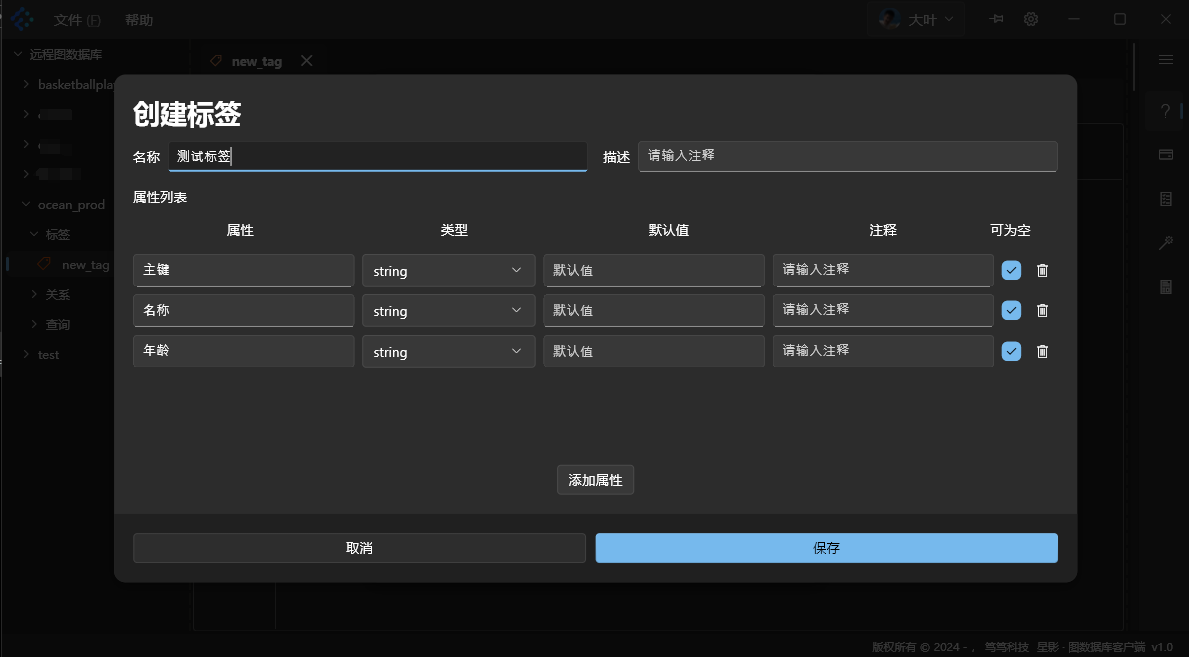
Refer to [4.7. Create a Tag or an Edge]
Once created, click the dropdown next to [new_tag], select your newly created [Test Tag], and follow the mapping procedure described in [5.6] to import the data into it.
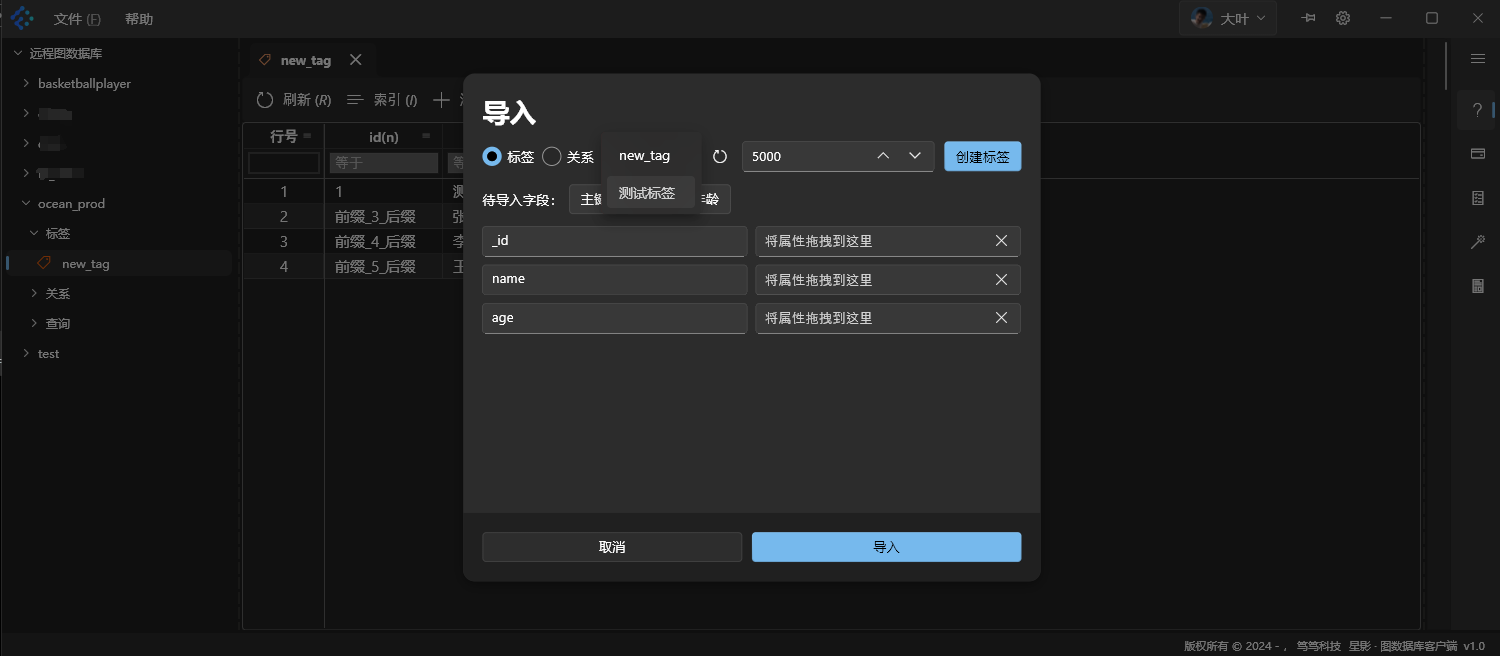
If your new tag “[Test Tag]” is not shown, click the refresh icon to update the dropdown list.
5.8. Data Filtering
Use the search box between the table header and the data rows to enter filter criteria, which filters the displayed data. If necessary, rebuild the relevant indexes (see [4.12]) to ensure performance.
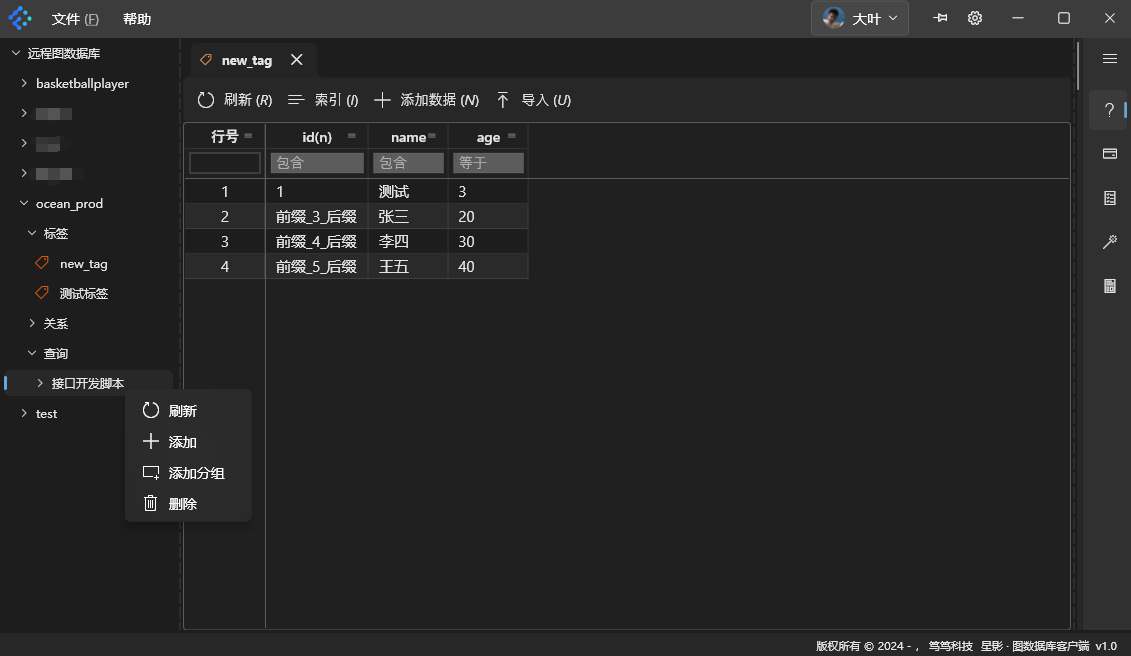
6. Script Management
Under the space name in the left-hand navigation tree, find [Queries]. Right-click to open the operations menu:
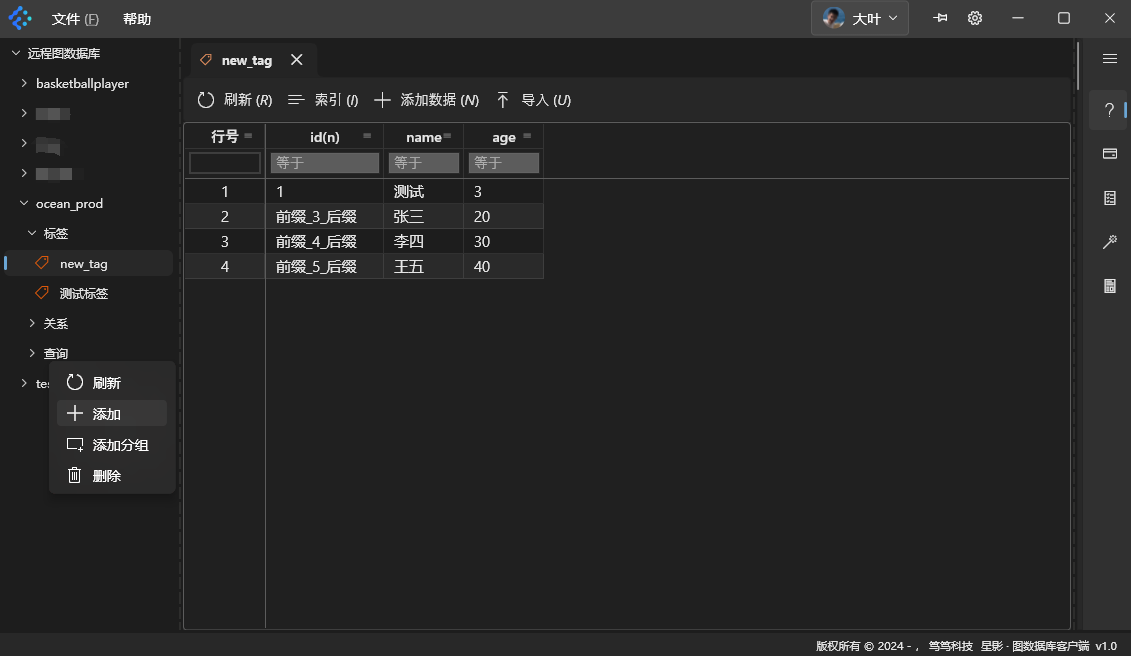
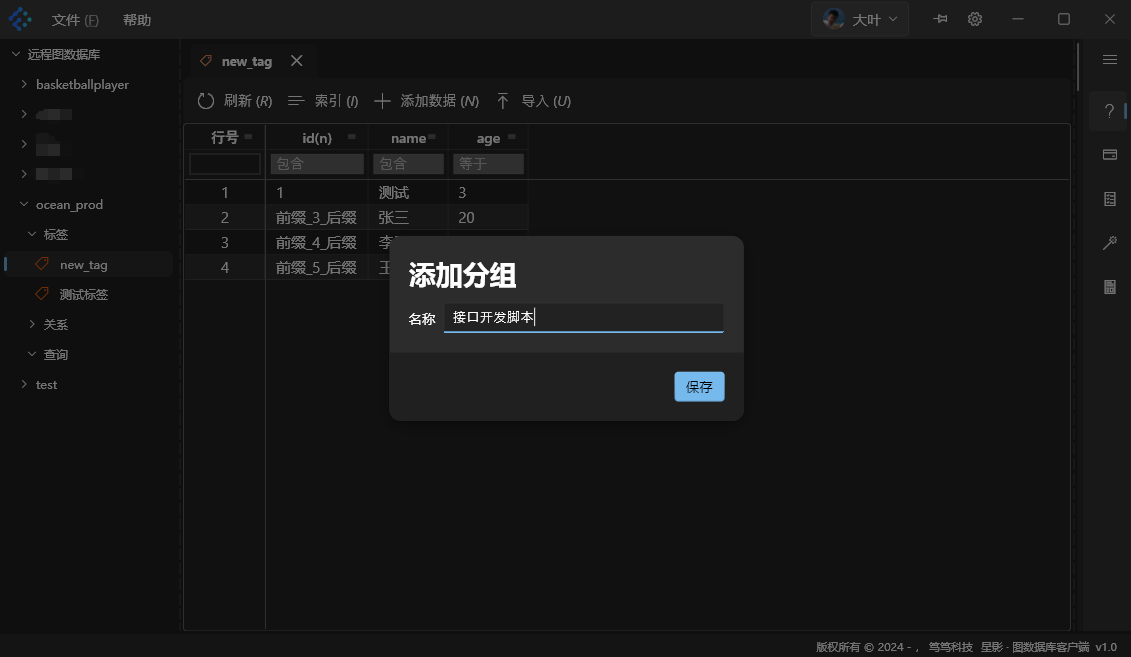
6.1 Add a Group
Click [Add Group]. In the form that appears, enter the group name. Click [Save] to complete group creation.
6.2 Delete a Group
Right-click the group and select [Delete] to remove it:
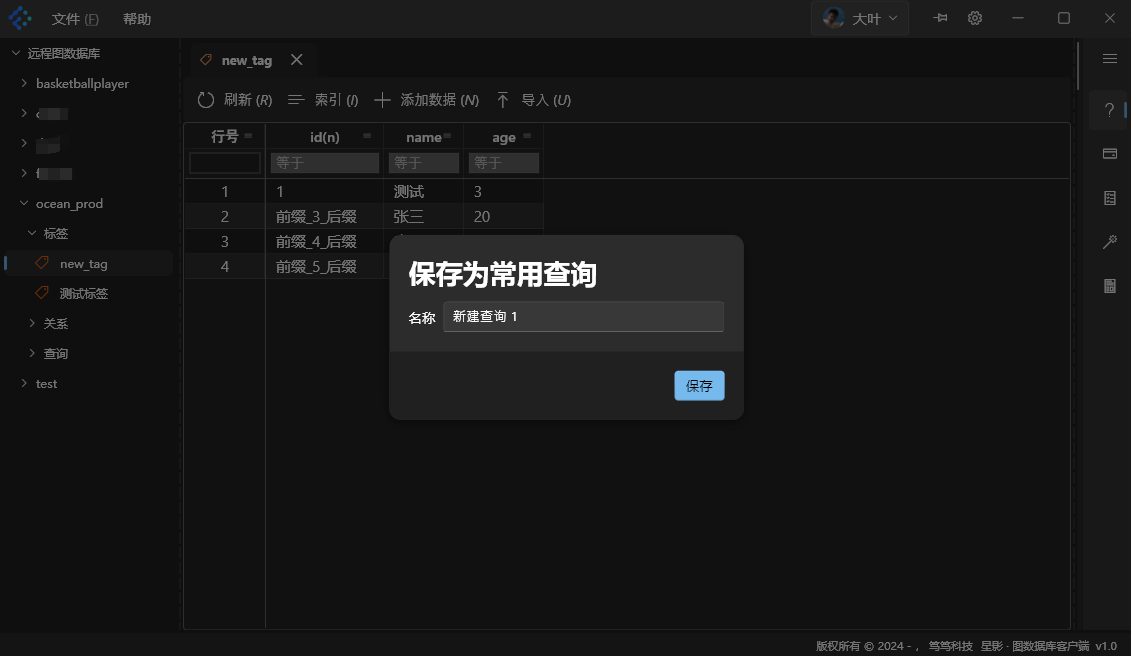
6.3 Add a Script
Right-click [Queries] or any group name and select [Add]. In the form, enter the script name. Click [Save] to complete the creation of a new script.
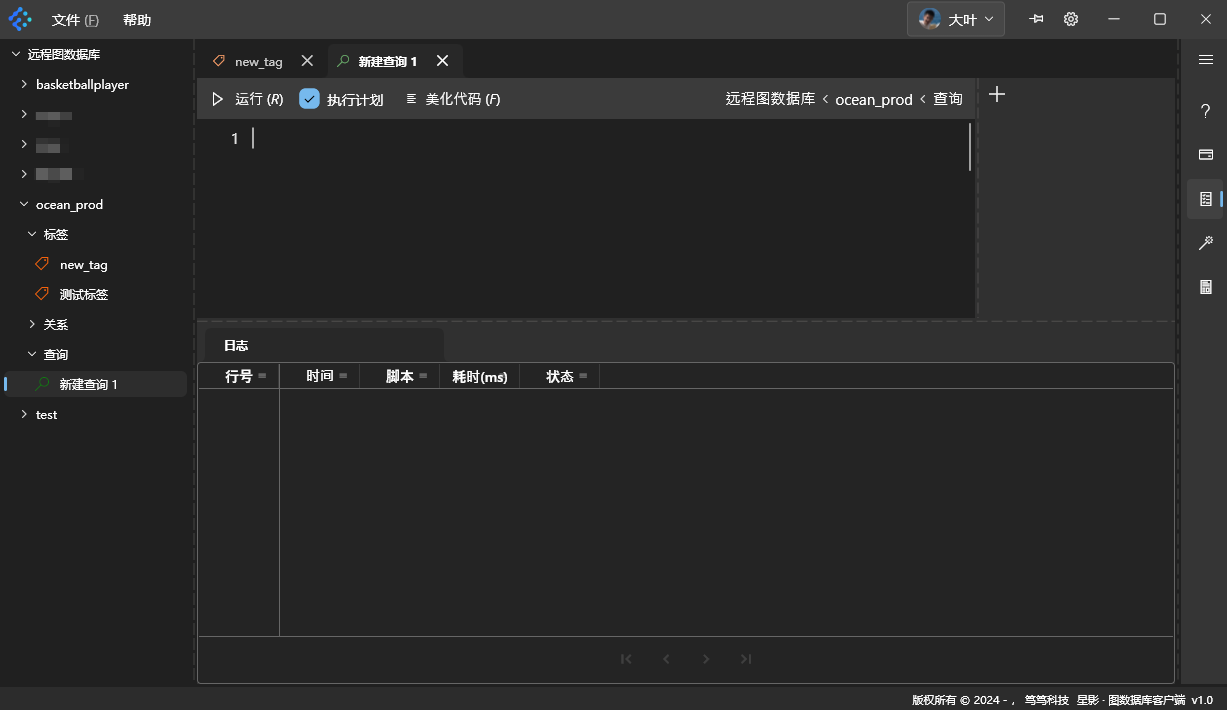
7. Editing and Running Scripts
7.1. Edit a Script
After creating a script, the script editor opens automatically, as shown:
7.2. Run the Script and View Results
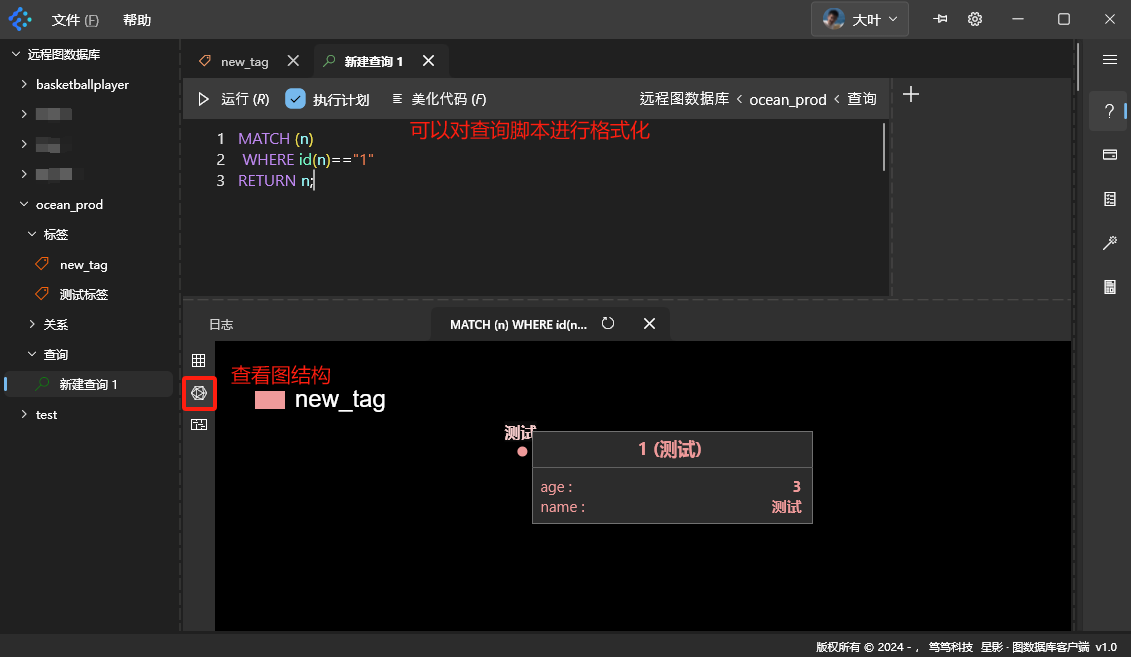
In the editor, you can type nGQL queries. Click [Run] to execute the script:
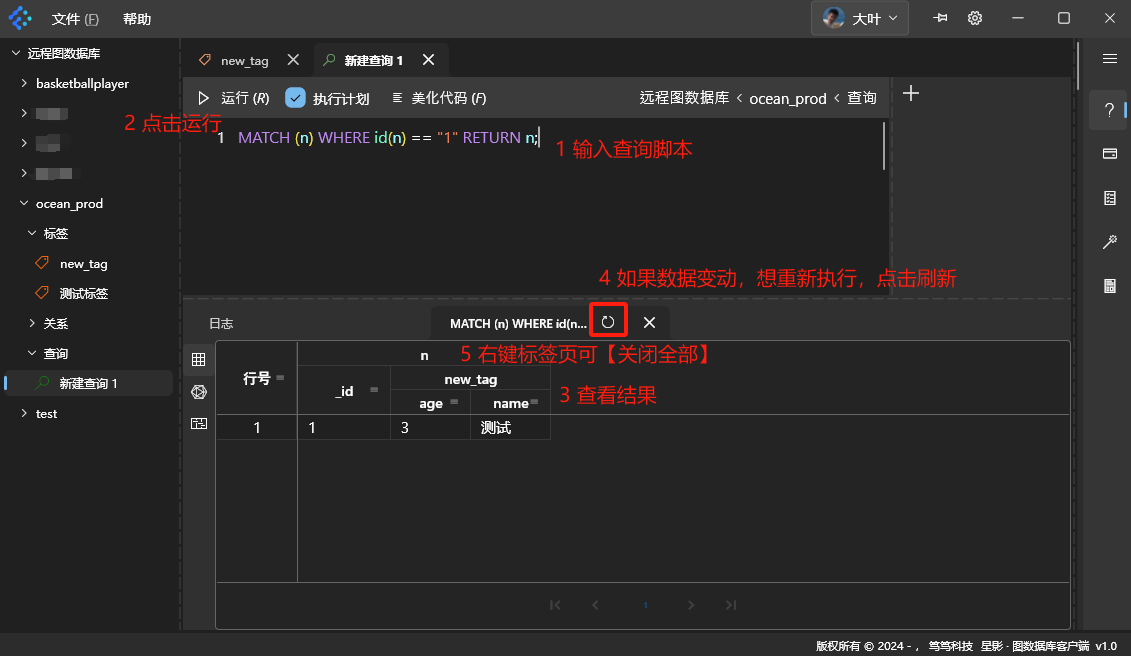
You can click [Format Code] to neatly format the script. Also, click the graph visualization icon to see query results as a graph:
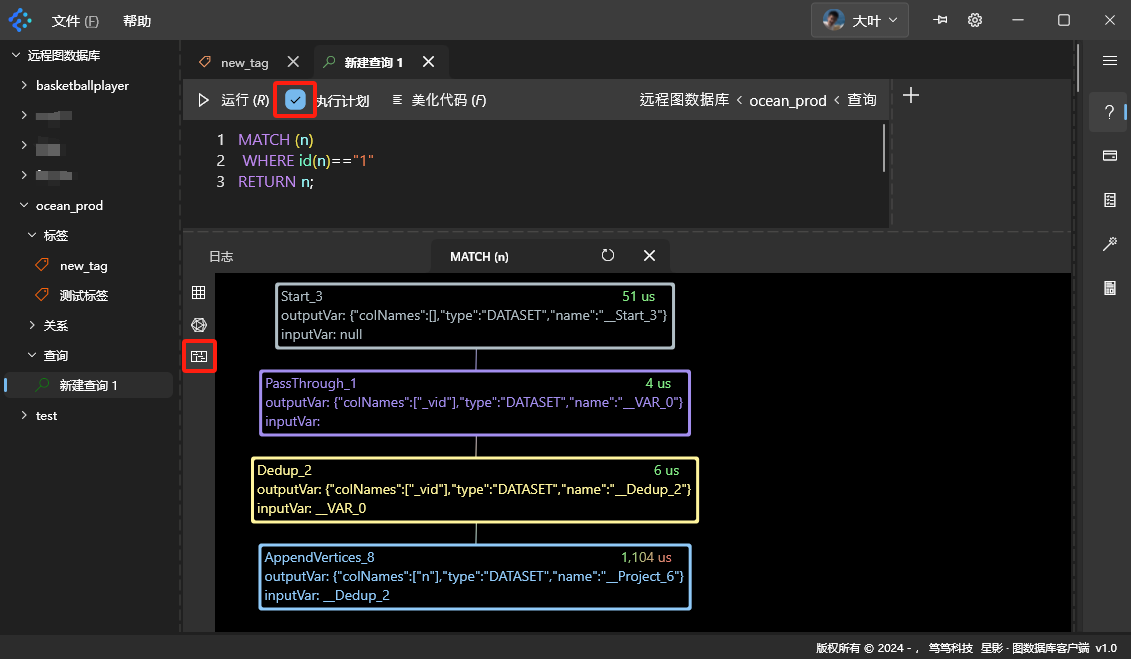
If [Execution Plan] is enabled (checked), you can click the icon at the bottom to view the execution plan for this script, as shown:
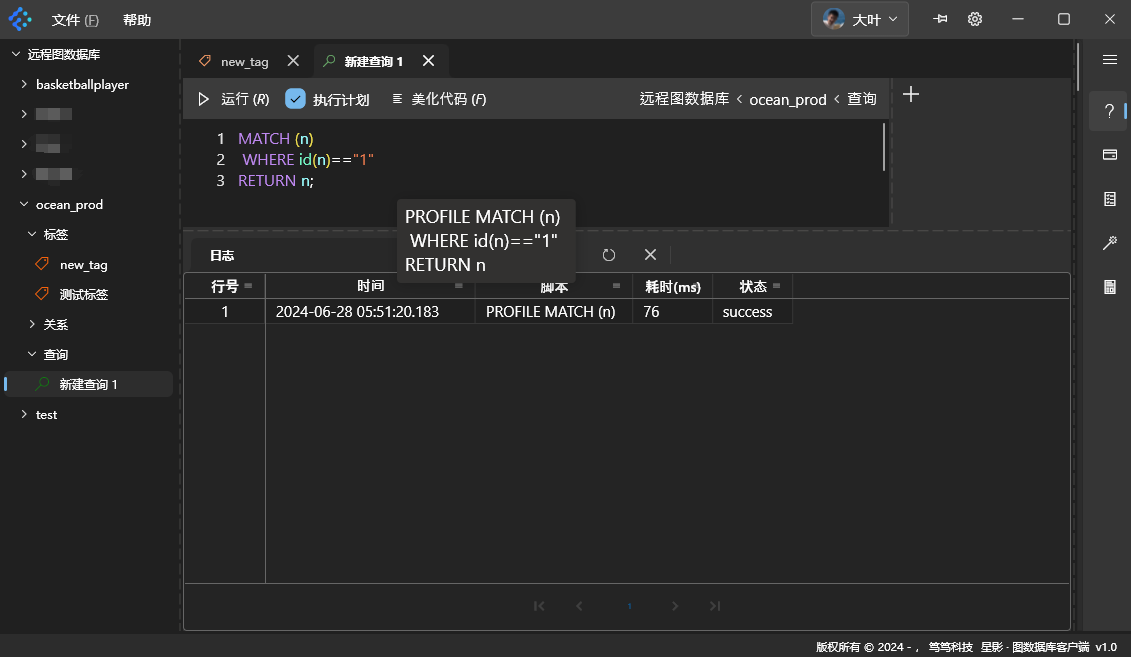
Additionally, switch the result tab to [Logs] to see logs about the script execution:
8. Using Script Parameters
8.1 Add Parameters
You can treat the script like a template and add parameters in the parameter panel on the right. For example:
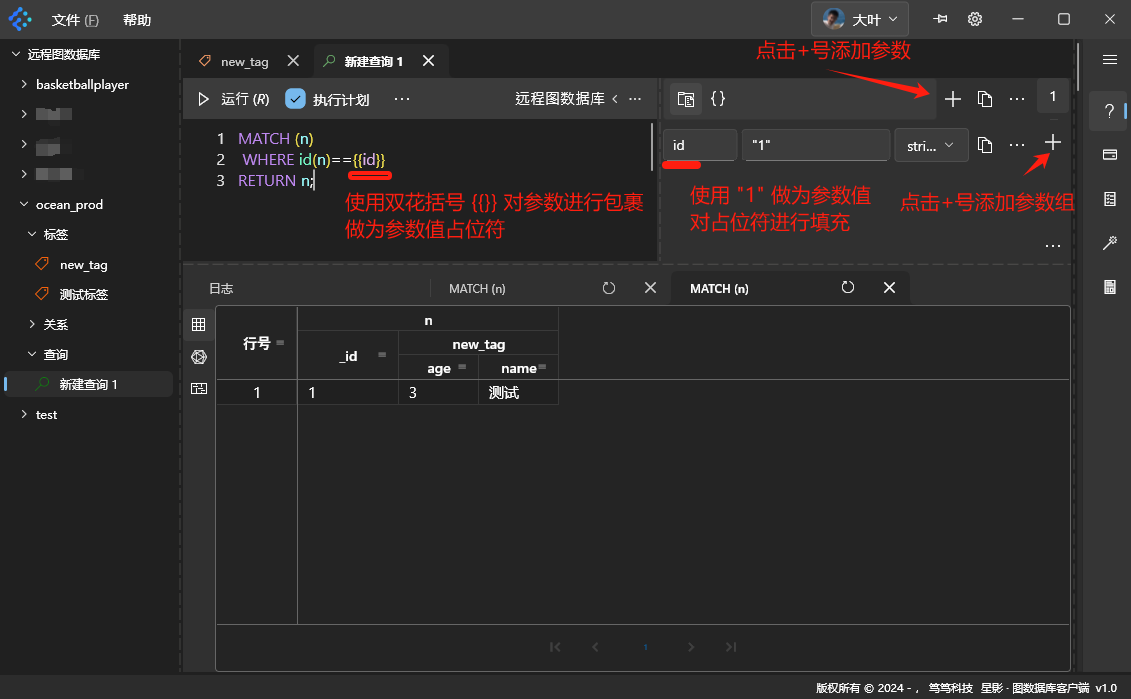
Click [Run] to execute the script with the specified parameters.
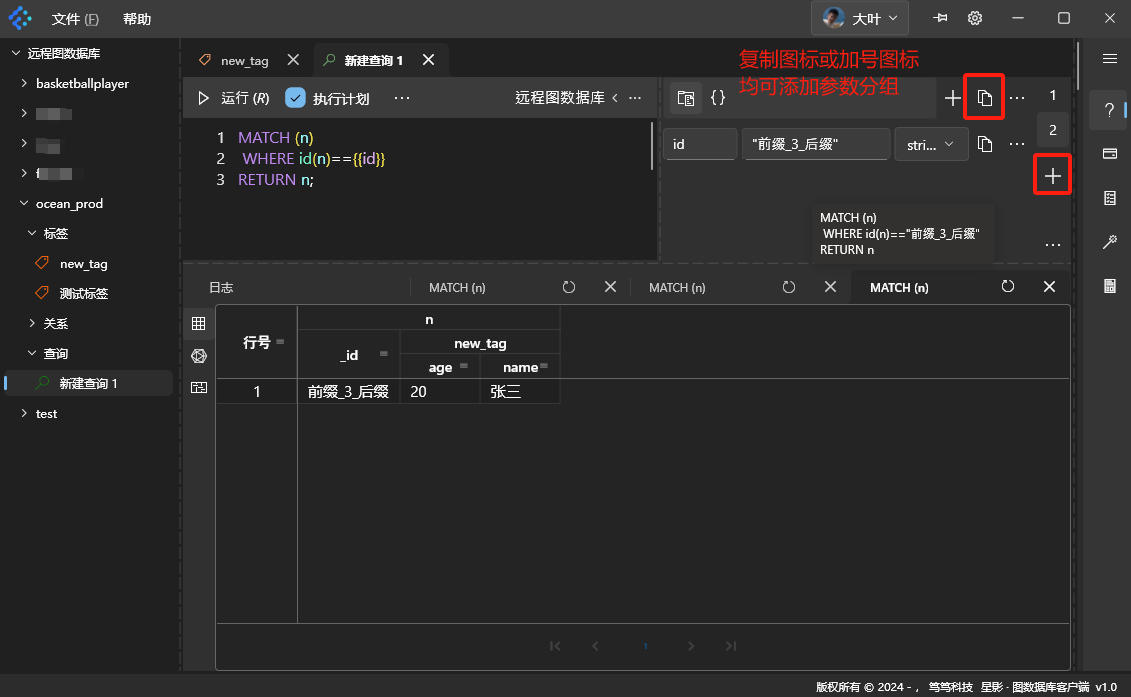
8.2 Parameter Groups
You can create multiple parameter groups. By switching groups, you activate a different set of parameters without needing to rewrite the script:
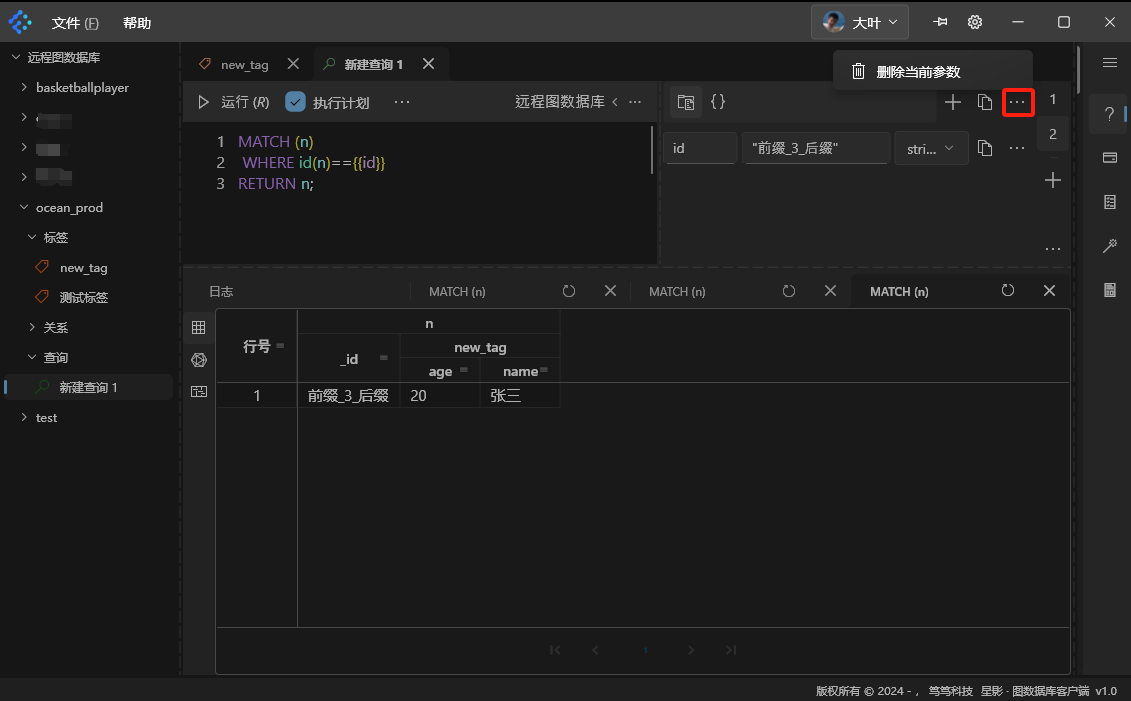
8.3 Delete Parameters
Click the [More] icon. In the menu that appears, select [Delete Current Parameters] to remove that parameter group or an individual parameter:
9. Settings
Click the [Settings] icon to open the settings interface:
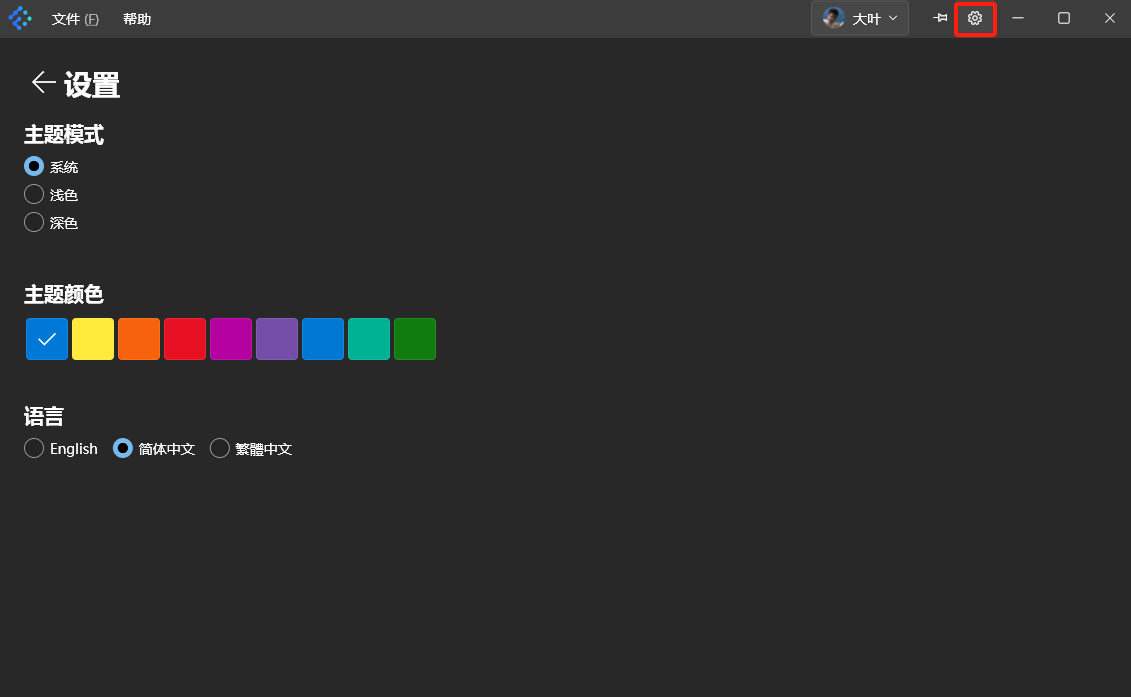
9.1. Theme Settings
You can choose the [Light] or [Dark] theme, and pick different accent colors.
9.2. Language Settings
You can choose [English], [Simplified Chinese], or [Traditional Chinese] as the software’s display language.
9.3. Style
For example, with a [Light] theme, red accent color, and [English] as the language, the result appears as follows:

Click the [Back] icon to return to the main interface, where it looks like:

10. Feedback
10.1. Issue List
Click the Issue List icon on the far right to enter the feedback interface:
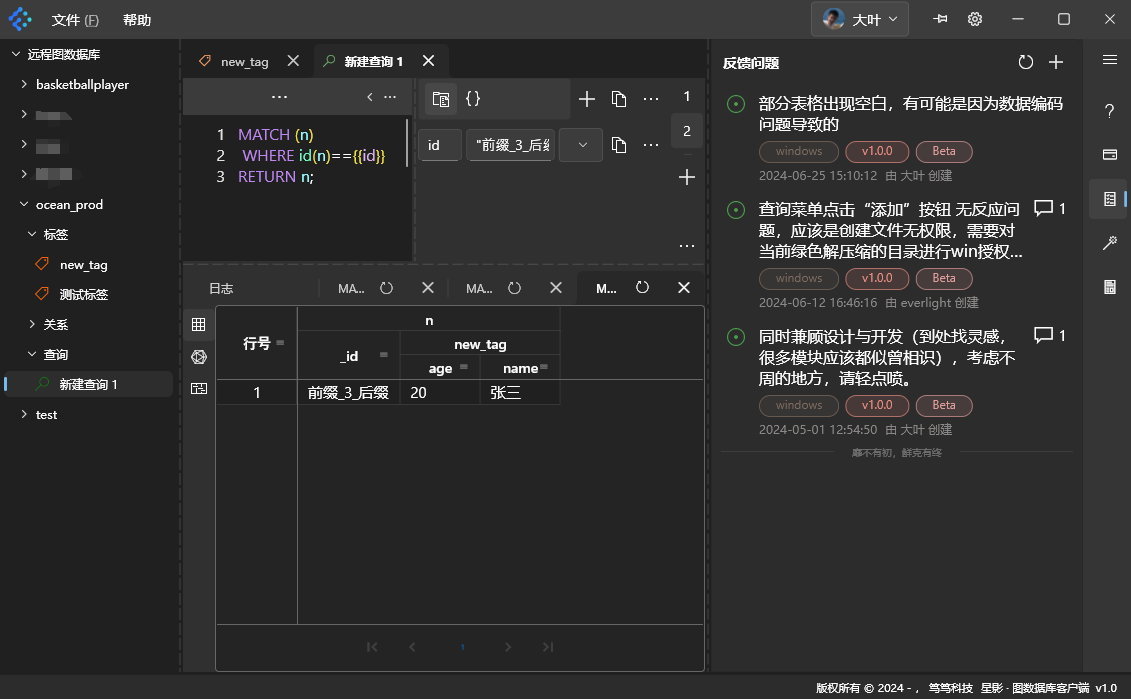
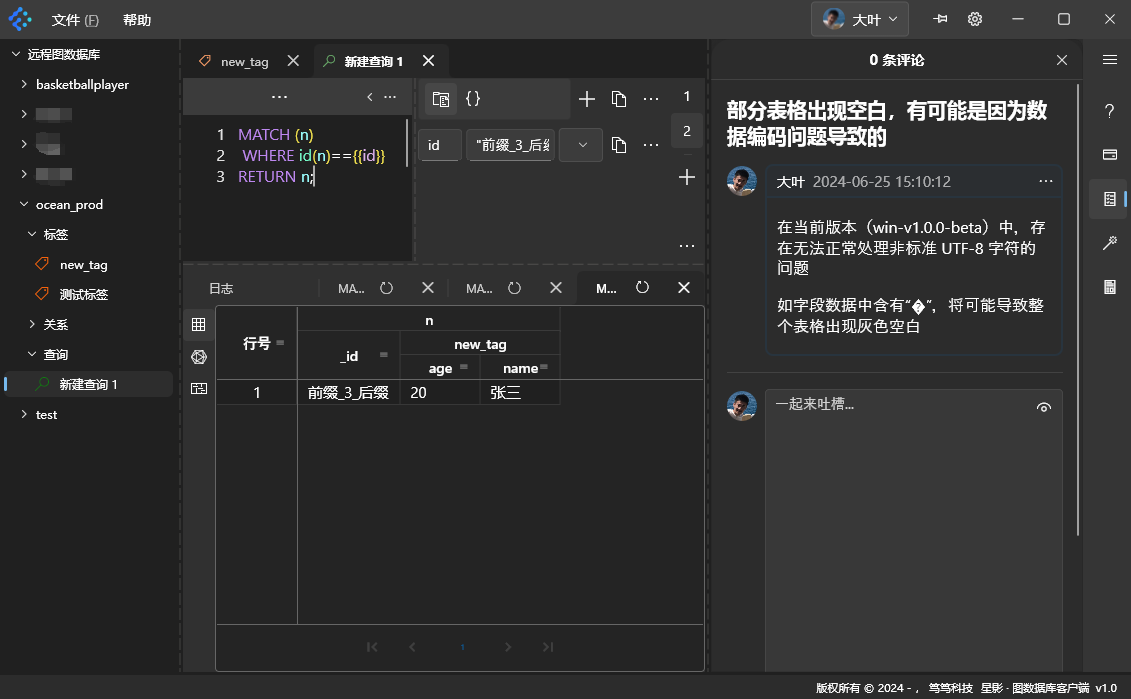
10.2. View Issue Details
Click an item in the issue feedback list to see more details and discuss it in the form below, as shown:
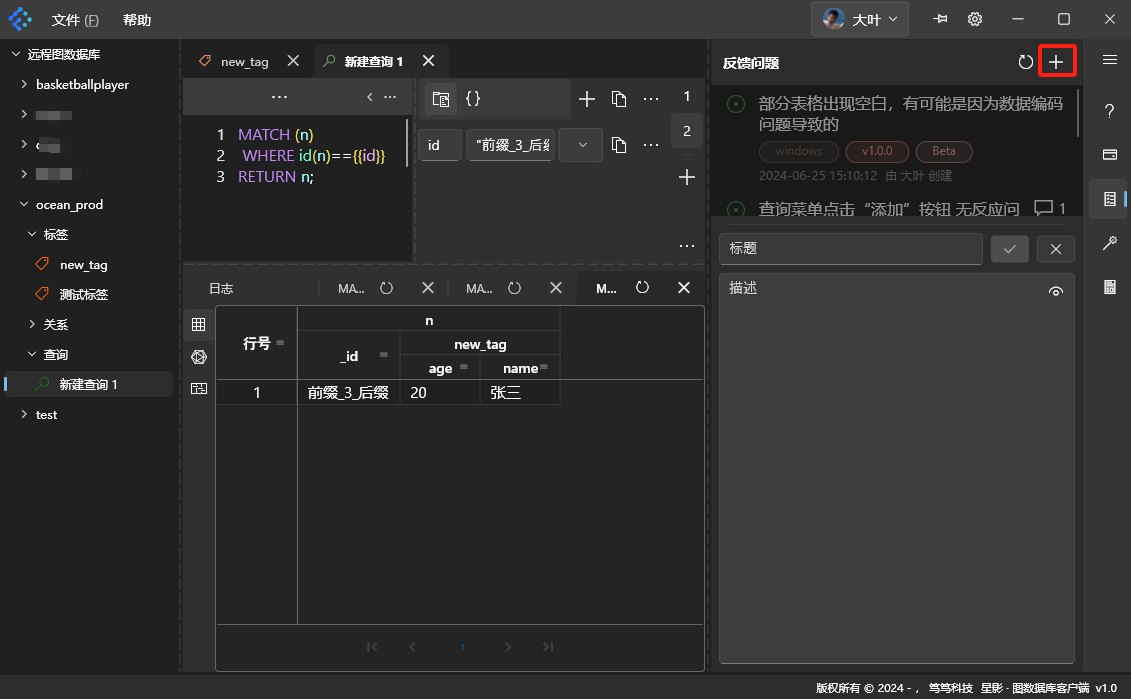
10.3. Add an Issue
Click the [+] icon at the top right of the feedback list to add an issue, as illustrated:
11. Make a Suggestion
Click the suggestion icon on the far right to access the suggestion feedback interface. Its functionality is similar to [Section 10. Feedback].
12. Window on Top
Click the pushpin icon at the top right of the window to pin it above other windows.
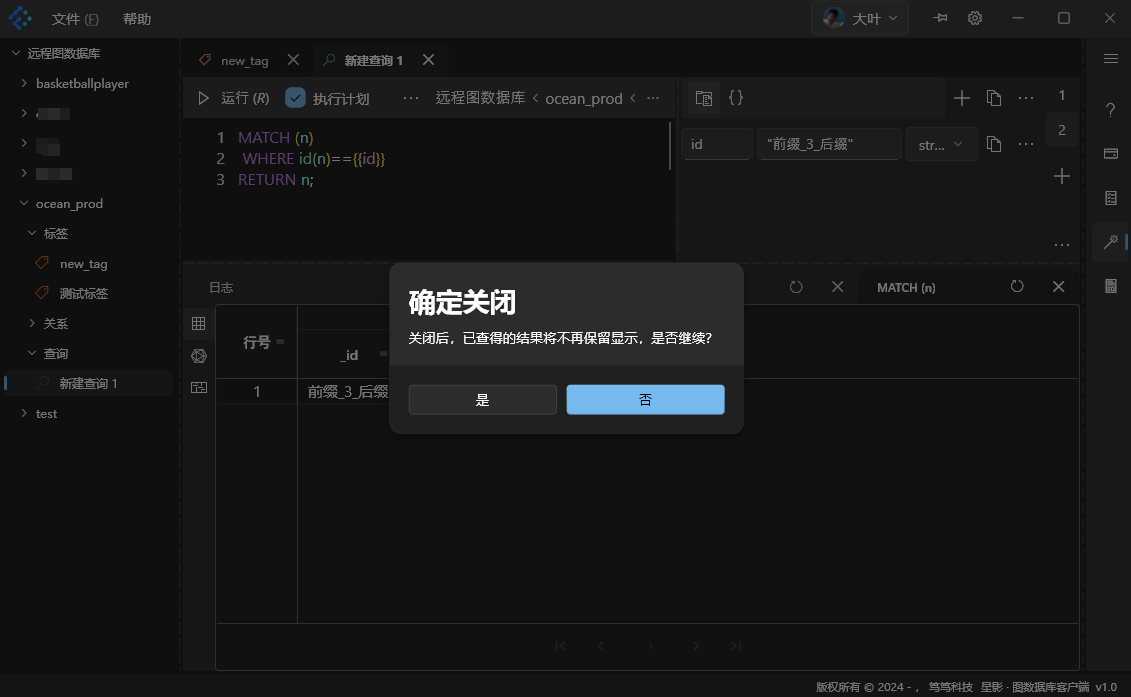
13. Exit the Software
Click the close icon in the top right corner of the window, or go to [File] -> [Exit]. A confirmation dialog appears. Click [Yes] to close the software, or [No] to cancel, as shown: